Transform your weekend mornings into something special with these four classic breakfast favorites that range from crispy waffles to delicate crepes. Each recipe delivers bakery-quality results at home while offering unique textures and flavors that turn ordinary breakfasts into memorable occasions worth waking up early for.
Fluffy Homemade Waffles
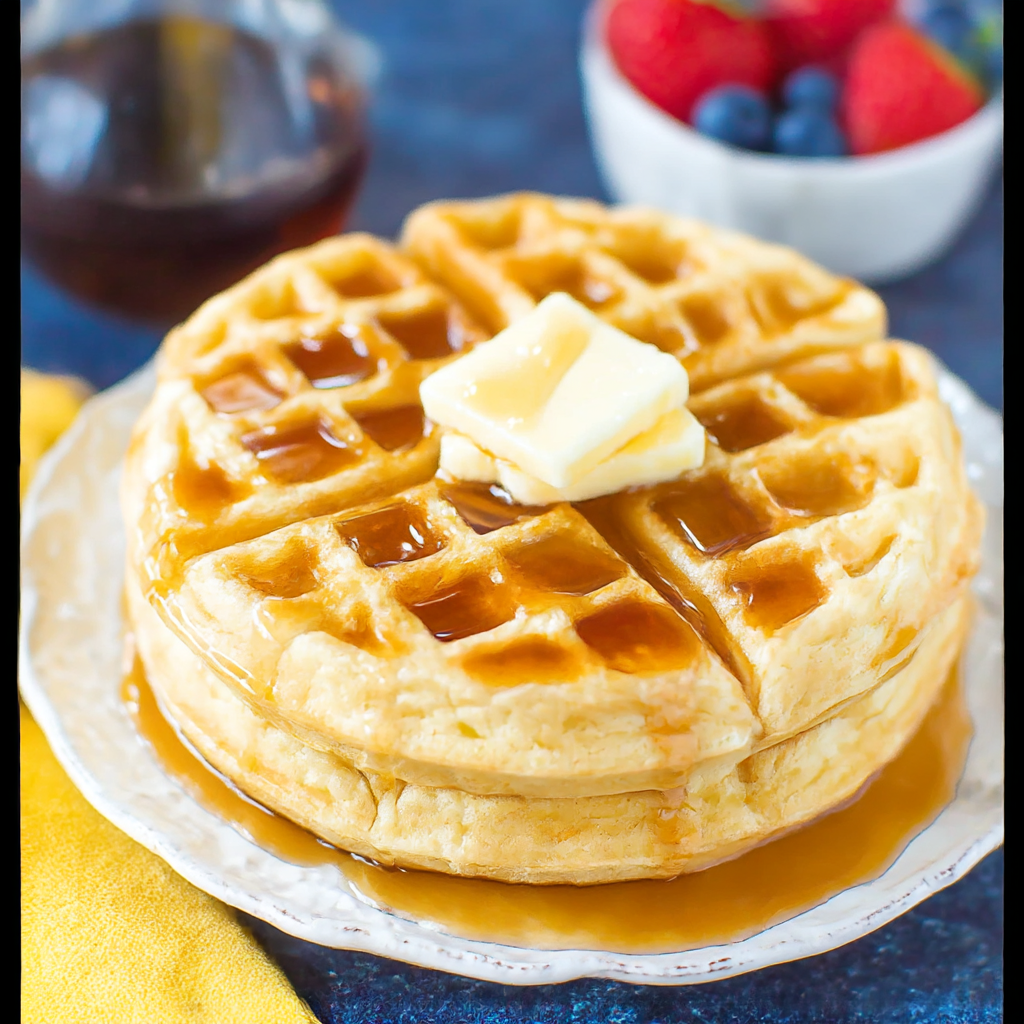
Fluffy Homemade Waffles feature a light, airy interior with crispy, golden exteriors created by separating eggs and folding in whipped egg whites. This technique transforms simple ingredients into restaurant-quality waffles with distinctive texture that’s simultaneously tender inside and crunchy outside.
Why You’ll Love This Recipe
Crispy Outside, Fluffy Inside – The separated egg technique creates maximum contrast between the crispy, golden exterior and the light, tender interior that defines perfect waffles.
Superior to Mixes – Homemade waffles taste dramatically better than boxed mixes while costing less and allowing complete control over ingredients and flavor.
Weekend Breakfast Special – These impressive waffles make weekend mornings feel special, turning ordinary breakfast into an occasion that brings everyone to the table eagerly.
Versatile Toppings – Serve with endless topping combinations from classic maple syrup and butter to fresh berries, whipped cream, or even savory options like fried chicken.
Make-Ahead Potential – Prepare extra waffles and freeze them for quick weekday breakfasts that toast up beautifully, maintaining their crispy texture.
Kid-Friendly Activity – Children love helping make and eat waffles, making this recipe perfect for family cooking time that creates both food and memories.
Ingredients You’ll Need
Dry Ingredients:
2 cups plain flour (240g) – provides the structure that creates the waffle’s body while contributing to the crispy exterior when properly cooked
1 tablespoon baking powder (12g) – creates the lift and airiness that makes waffles light and fluffy rather than dense and heavy
½ teaspoon salt (3g) – enhances all flavors and balances the sweetness while strengthening the gluten structure slightly
2 tablespoons sugar (25g) – adds subtle sweetness and promotes browning that creates the golden, crispy exterior
Wet Ingredients:
2 large eggs, separated – provides structure from the yolks and incredible lightness from the whipped whites that create signature fluffy texture
1⅔ cups milk (400ml) – adds moisture and creates steam during cooking that helps produce crispy exteriors and tender interiors
⅓ cup melted butter or oil (75ml) – contributes richness, flavor, and fat that creates tender crumb while preventing sticking to the waffle iron
1 teaspoon vanilla extract (5ml) – enhances overall flavor with aromatic sweetness that complements the butter and sugar
Step-by-Step Instructions
Preheat Waffle Maker
Turn on your waffle maker and allow it to heat to 400°F (200°C), ensuring it’s completely hot before adding batter so the waffles cook evenly and develop proper crispiness.
Combine Base Ingredients
In a large mixing bowl, whisk together the flour, baking powder, salt, and sugar, then add the egg yolks (reserving whites separately), milk, melted butter, and vanilla extract, stirring until just combined with some small lumps remaining.
Whip Egg Whites
In a separate clean, dry bowl, beat the egg whites with an electric mixer on high speed until they form stiff peaks that hold their shape when you lift the beaters, creating the air that makes waffles light.
Fold in Egg Whites
Gently fold the whipped egg whites into the batter using a spatula and a folding motion that cuts down through the center and sweeps up the sides, being careful not to deflate the whites by overmixing.
Cook Waffles
Pour the appropriate amount of batter onto the hot, greased waffle maker (usually about ¾ cup, but check your model’s capacity), close the lid, and cook for 3-5 minutes until the waffle is golden brown and crispy on the outside.
Serve Immediately
Transfer cooked waffles directly to plates and serve immediately while hot and crispy, or keep warm in a 200°F oven on a wire rack until all waffles are ready.
Recipe Notes & Tips
Room Temperature Ingredients – Bring eggs and milk to room temperature before starting for better mixing and more consistent batter texture that cooks evenly.
Don’t Overmix – Stir the base batter just until ingredients combine; lumps are perfectly acceptable and actually help create tender waffles rather than tough ones.
Gentle Folding Technique – Fold egg whites gently using broad strokes rather than stirring, which deflates the air bubbles you worked hard to create.
Waffle Maker Variations – Cooking time varies by model; check manufacturer’s instructions and look for steam reduction as a sign waffles are ready.
Oil vs. Butter – Melted butter provides superior flavor while oil creates slightly crispier waffles; choose based on your preference or use a combination.
Resting the Batter – Let batter rest 5 minutes before cooking to allow flour to hydrate fully and gluten to relax, creating more tender waffles.
Nutritional Information
Prep Time: 10 minutes
Cook Time: 3-5 minutes per waffle
Total Time: 20-30 minutes (depending on batch size)
Yield: 6-8 waffles (depending on waffle maker size)
Calories: Approximately 250-300 calories per waffle (without toppings)
Perfect Pairings
Classic Maple Syrup – Drizzle with pure maple syrup and a pat of butter for the traditional presentation that never goes out of style.
Fresh Berry Compote – Top with warm berry compote made from mixed berries, sugar, and lemon juice for a sophisticated, fruity alternative.
Whipped Cream and Fruit – Pile high with freshly whipped cream and seasonal fresh fruit for a dessert-like breakfast that feels indulgent.
Savory Options – Serve with fried chicken, crispy beef bacon, or poached eggs for a sweet-savory combination that’s become increasingly popular.
Ideal Occasions
Weekend Brunch – These special waffles make Saturday or Sunday morning feel like an event worth lingering over rather than rushing through.
Birthday Breakfasts – Celebrate special occasions by serving birthday waffles with candles, turning the first meal into part of the celebration.
Holiday Mornings – Create tradition by making these waffles on holiday mornings when family gathers and you want something memorable and delicious.
Sleepover Breakfasts – Impress your children’s friends with homemade waffles that taste better than any restaurant, making your home the favorite gathering spot.
Storage & Serving Tips
Keep Warm Method – Place cooked waffles on a wire rack in a 200°F oven to stay warm and crispy while you finish the batch, preventing sogginess.
Freezing Instructions – Cool waffles completely, then freeze in a single layer on a baking sheet before transferring to freezer bags for up to 3 months.
Reheating from Frozen – Toast frozen waffles directly in a toaster or toaster oven until hot and crispy, which works better than microwaving that creates sogginess.
Preventing Sticking – Even with non-stick waffle makers, spray with cooking oil before each waffle to ensure easy release and prevent frustrating sticking.
Creative Variations to Try
Whole Wheat Waffles – Replace half the all-purpose flour with whole wheat flour for nuttier flavor and additional fiber, adjusting milk if needed.
Chocolate Chip Waffles – Sprinkle mini chocolate chips onto the batter immediately after pouring into the waffle maker for melty chocolate pockets throughout.
Buttermilk Waffles – Substitute buttermilk for regular milk and reduce baking powder slightly for tangier flavor and even more tender texture.
Cinnamon Spice Waffles – Add 1 teaspoon cinnamon and ¼ teaspoon nutmeg to the dry ingredients for warm, spiced flavor perfect for autumn mornings.
Troubleshooting Common Issues
Waffles sticking – Ensure the waffle maker is fully preheated and properly greased; old, worn non-stick surfaces may need replacement or extra cooking spray.
Soggy waffles – This happens from not cooking long enough or stacking hot waffles directly on top of each other; cook until steam stops and keep on wire racks.
Dense texture – Usually caused by deflating egg whites through overmixing or using eggs that weren’t beaten to stiff peaks; fold more gently next time.
Uneven browning – Your waffle maker may have hot spots; rotate or adjust temperature, and ensure batter distributes evenly when you close the lid.
Why This Recipe Works
Homemade Waffles succeed because the separated egg technique creates two distinct textures that define perfect waffles. Egg yolks contribute richness, emulsification, and tenderness through their fats and lecithin, while separately beaten egg whites introduce thousands of tiny air bubbles that expand during cooking, creating light, fluffy interior structure. Baking powder provides additional chemical leavening that reinforces the lift from egg whites, ensuring consistent results even if the whites aren’t perfectly beaten. The relatively high fat content from butter creates tender crumb by shortening gluten strands, while also contributing to crispy exteriors through browning. Sugar promotes caramelization on the hot waffle iron surface, developing golden color and crispy texture. The batter’s consistency—thick enough to hold air bubbles but thin enough to spread—creates the right balance between structure and tenderness. Cooking at high temperature creates immediate crust formation that seals in moisture while creating crispy exteriors, with the batter’s moisture converting to steam that pushes against this crust, creating the characteristic waffle pockets. At 250-300 calories per waffle, these provide reasonable portion sizes that become a complete breakfast when paired with protein like eggs or yogurt.
Final Thoughts
Fluffy Homemade Waffles demonstrate that taking a few extra steps—separating eggs, whipping whites, gentle folding—produces dramatically superior results compared to simply mixing everything together. The technique is accessible enough for beginners while teaching fundamental cooking skills about incorporating air and handling delicate ingredients. Making waffles from scratch costs significantly less than buying frozen versions while delivering incomparably better flavor and texture that makes the effort worthwhile. While certainly a weekend or special occasion breakfast rather than rushed weekday fare, the ability to freeze extras means one batch provides multiple quick breakfasts that reheat beautifully. The versatility in toppings and serving options makes waffles appropriate for any meal from breakfast through dessert, proving their value extends far beyond typical morning service.
Crispy Spanish Churros
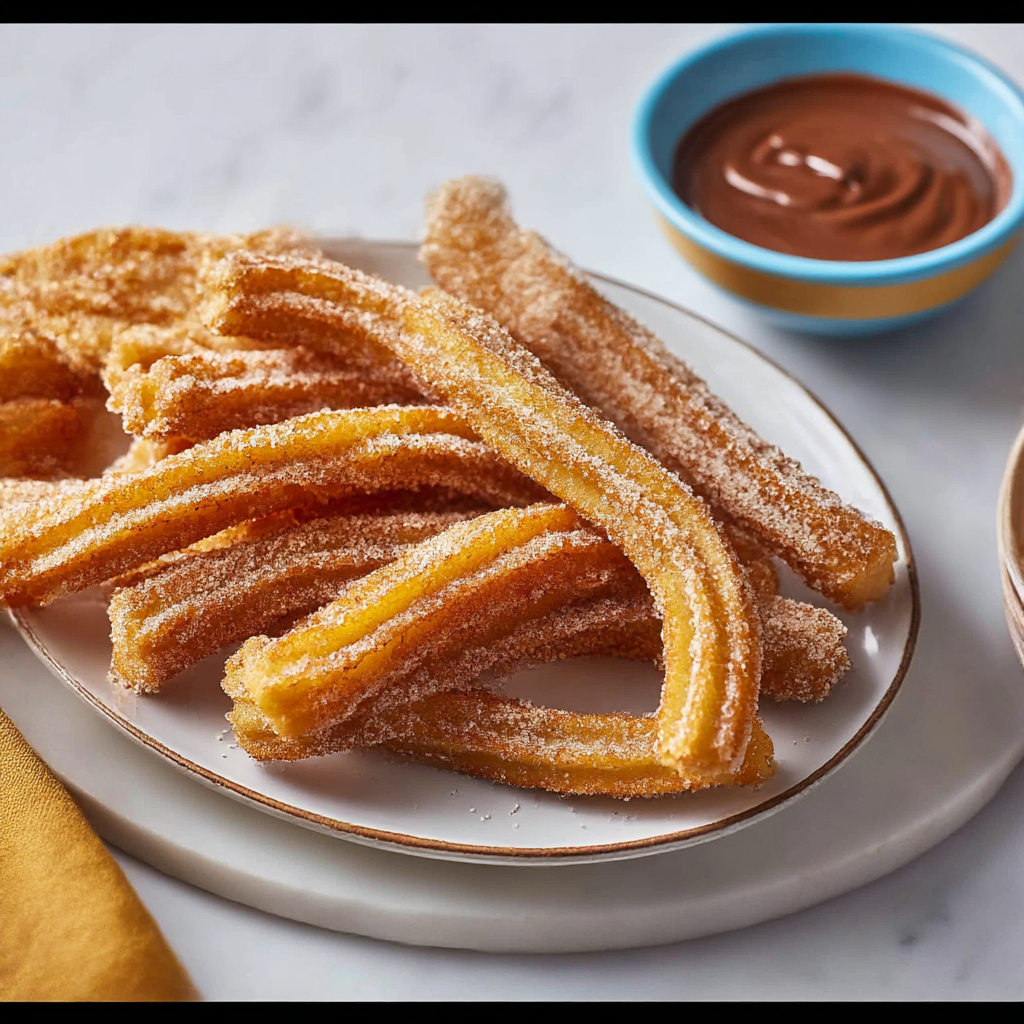
Crispy Spanish Churros feature ridged, fried dough strips with crunchy exteriors and soft, airy centers, rolled in sugar and served with melted chocolate for dipping. This beloved Spanish treat brings carnival and café flavors home with surprisingly simple ingredients and techniques that create impressive results.
Why You’ll Love This Recipe
Carnival at Home – These churros capture the magic of fair food and Spanish cafés, bringing special-occasion excitement to your own kitchen anytime you crave them.
Crispy-Soft Texture – The ridged shape and proper frying create maximum crunch on the outside while maintaining soft, almost hollow interiors that define authentic churros.
Simple Ingredients – Basic pantry staples—flour, milk, water, butter—transform into something extraordinary through proper technique, proving that impressive doesn’t require exotic components.
Fun to Make – Piping dough into hot oil and watching it puff and brown creates an engaging cooking experience that’s entertaining even before eating begins.
Chocolate Dipping – Serving with melted chocolate for dipping creates an interactive eating experience that’s both delicious and memorable, especially for children.
Fresh and Warm – Unlike store-bought options, homemade churros eaten immediately after frying deliver unmatched flavor and texture that can’t be replicated later.
Ingredients You’ll Need
Dough Components:
1 cup plain flour (120g) – provides the gluten structure that creates churros’ characteristic chew and supports their shape during frying
½ cup milk (120ml) – adds richness and contributes to browning while creating tender texture through its proteins and sugars
½ cup water (120ml) – creates steam during frying that expands the dough and forms the soft, airy interior
½ teaspoon salt (3g) – enhances flavor and strengthens gluten structure slightly, helping churros hold their shape
2½ tablespoons sugar (30g) – adds subtle sweetness to the dough and promotes browning during frying
2 tablespoons butter (30g) – contributes richness, flavor, and fat that creates tender texture while helping dough pipe smoothly
For Frying and Coating:
Oil for frying (vegetable or canola oil) – provides the medium for high-heat cooking that creates crispy exteriors and cooks interiors thoroughly
Castor sugar for coating – adds sweet, crystalline coating that contrasts with the savory dough and provides textural interest
Melted chocolate for dipping – creates rich, indulgent accompaniment that complements the sweet, fried dough perfectly
Step-by-Step Instructions
Prepare the Dough Base
Combine the milk, water, sugar, salt, and butter in a medium saucepan and bring to a full, rolling boil over medium-high heat, stirring occasionally to ensure the butter melts completely.
Form the Dough
Remove the pan from heat immediately when the mixture boils, then add all the flour at once and stir vigorously with a wooden spoon until the mixture forms a cohesive dough that pulls away from the pan sides, about 1-2 minutes of continuous stirring.
Prepare for Piping
Transfer the warm dough to a piping bag fitted with a large star tip (at least ½-inch opening), pushing the dough down to remove air pockets, then let the filled bag rest for 2 minutes to cool slightly and relax the gluten.
Heat the Oil
Pour oil into a deep, heavy-bottomed pan to a depth of at least 2-3 inches and heat over medium-high heat until it reaches 375°F (190°C) on a thermometer, or until a small piece of dough sizzles immediately when dropped in.
Pipe and Fry
Hold the piping bag over the hot oil and squeeze out 4-6 inch strips of dough directly into the oil, cutting with scissors to release each churro, then fry for 2-3 minutes per side until deep golden brown all over, working in small batches to avoid crowding.
Drain and Coat
Remove fried churros with a slotted spoon or spider strainer and place on paper towels to drain excess oil for 10-15 seconds, then immediately roll in castor sugar while still hot so the sugar adheres properly.
Serve with Chocolate
Arrange the warm, sugar-coated churros on a serving plate alongside a bowl of melted chocolate for dipping, and serve immediately while the churros are at their crispiest and most delicious.
Recipe Notes & Tips
Oil Temperature Control – Maintain steady 375°F oil temperature; too hot causes burning before interiors cook, while too cool creates greasy, soggy churros.
Star Tip Essential – The ridged star tip isn’t just decorative—it creates surface area that becomes extra crispy and helps the sugar coating adhere better.
Batch Frying – Fry only 3-4 churros at a time to prevent oil temperature from dropping too much, which results in greasy rather than crispy results.
Immediate Sugar Coating – Roll churros in sugar while they’re still very hot and slightly oily so the sugar sticks properly; waiting even a minute reduces adhesion.
Dough Consistency – The dough should be thick enough to hold shape when piped but soft enough to squeeze through the bag; if too stiff, let it cool slightly.
Safety Precautions – Use extreme caution when piping dough into hot oil; keep hands and arms away from potential splatters, and never leave hot oil unattended.
Nutritional Information
Prep Time: 10 minutes
Cook Time: 15-20 minutes (including frying in batches)
Total Time: 25-30 minutes
Yield: 12-15 churros (depending on length)
Calories: Approximately 80-100 calories per churro (before chocolate dipping)
Perfect Pairings
Hot Chocolate – Serve alongside thick Spanish hot chocolate (chocolate a la taza) for the traditional café con chocolate experience.
Coffee – Pair with strong coffee or café con leche for a classic Spanish breakfast or afternoon merienda snack.
Dulce de Leche – Offer caramel dulce de leche as an alternative dipping sauce for those who prefer caramel over chocolate.
Ice Cream – Serve fresh churros alongside vanilla ice cream for a temperature contrast that’s both surprising and delicious.
Ideal Occasions
Weekend Treats – Make these special churros on lazy weekend mornings or afternoons when you have time to enjoy the frying process and eat them fresh.
Party Desserts – Serve at gatherings where the interactive dipping creates conversation and the dramatic presentation impresses guests.
Movie Night Snacks – Prepare for family movie nights as a special treat that’s more exciting than standard popcorn or candy.
Cultural Exploration – Introduce children to Spanish food culture through this approachable, delicious entry point that makes learning fun and tasty.
Storage & Serving Tips
Best Fresh – Churros taste dramatically better when eaten immediately after frying while they’re still hot and maximally crispy; plan to serve right away.
Brief Storage – If absolutely necessary, store cooled churros in an airtight container at room temperature for up to 24 hours, though texture suffers significantly.
Reheating Method – Revive day-old churros by reheating in a 375°F oven for 3-5 minutes to restore some crispness, though they’ll never match fresh.
Chocolate Preparation – Melt chocolate just before serving in a microwave or double boiler, keeping it warm throughout service for optimal dipping consistency.
Creative Variations to Try
Cinnamon Sugar – Mix cinnamon with the sugar for coating to create churros with warm, spiced flavor that’s popular in many regions.
Filled Churros – After frying, use a small paring knife to create a hole and pipe in dulce de leche, chocolate, or cream filling for extra indulgence.
Chocolate Churros – Add 2 tablespoons cocoa powder to the dough for chocolate-flavored churros that work beautifully with caramel or vanilla dipping sauces.
Smaller Bite-Size – Pipe shorter 2-inch churros for party-friendly portions that are easier to eat while standing and mingling.
Troubleshooting Common Issues
Churros exploding in oil – This happens when oil is too hot or dough too wet; reduce heat and ensure dough is thick enough to hold shape.
Greasy, soggy texture – Oil temperature is too low, causing churros to absorb oil rather than crisp; increase heat and fry fewer at once.
Difficult to pipe – Dough may be too cool and stiff; knead briefly to warm or transfer to a new bag, as body heat from handling helps soften it.
Uneven cooking – Churros are too thick or oil temperature inconsistent; pipe thinner churros and monitor temperature throughout frying.
Why This Recipe Works
Spanish Churros succeed through the combination of choux-like dough preparation and proper deep-frying technique that creates two distinct textures. Boiling the liquid ingredients before adding flour gelatinizes the starches, creating a dough that can absorb large amounts of liquid while maintaining structure. The high moisture content in the dough converts to steam during frying, expanding the interior and creating the characteristic hollow or airy center. The ridged star tip creates maximum surface area that becomes extra crispy while also creating pockets that hold more sugar coating. Frying at the correct temperature creates immediate crust formation that seals in moisture while the interior steams and expands. The butter in the dough contributes to browning through the Maillard reaction while adding richness that balances the sweetness. Rolling in sugar while hot causes some sugar to partially dissolve and adhere firmly, creating a sweet crust that provides textural contrast to the soft interior. The combination of crispy exterior, tender-airy inside, sweet coating, and rich chocolate creates multiple sensory experiences that make churros so satisfying and memorable.
Final Thoughts
Crispy Spanish Churros demonstrate that impressive, bakery-quality treats are achievable at home with basic ingredients and proper technique. The hands-on nature of making churros—mixing, piping, frying, coating—creates an engaging cooking experience that’s as enjoyable as eating the final product. While certainly a special-occasion food rather than everyday breakfast, the relatively quick preparation and cooking time make churros accessible for weekend mornings or afternoon treats when you want something memorable. The cultural connection to Spanish cuisine provides opportunities for exploring food traditions while creating delicious results that appeal universally across ages and backgrounds. While fried and sugar-coated certainly makes churros an indulgence, their moderate portion size means enjoying 2-3 pieces provides satisfaction without excessive calories, especially when shared with family or friends as part of a social eating experience.
Classic Fluffy Pancakes
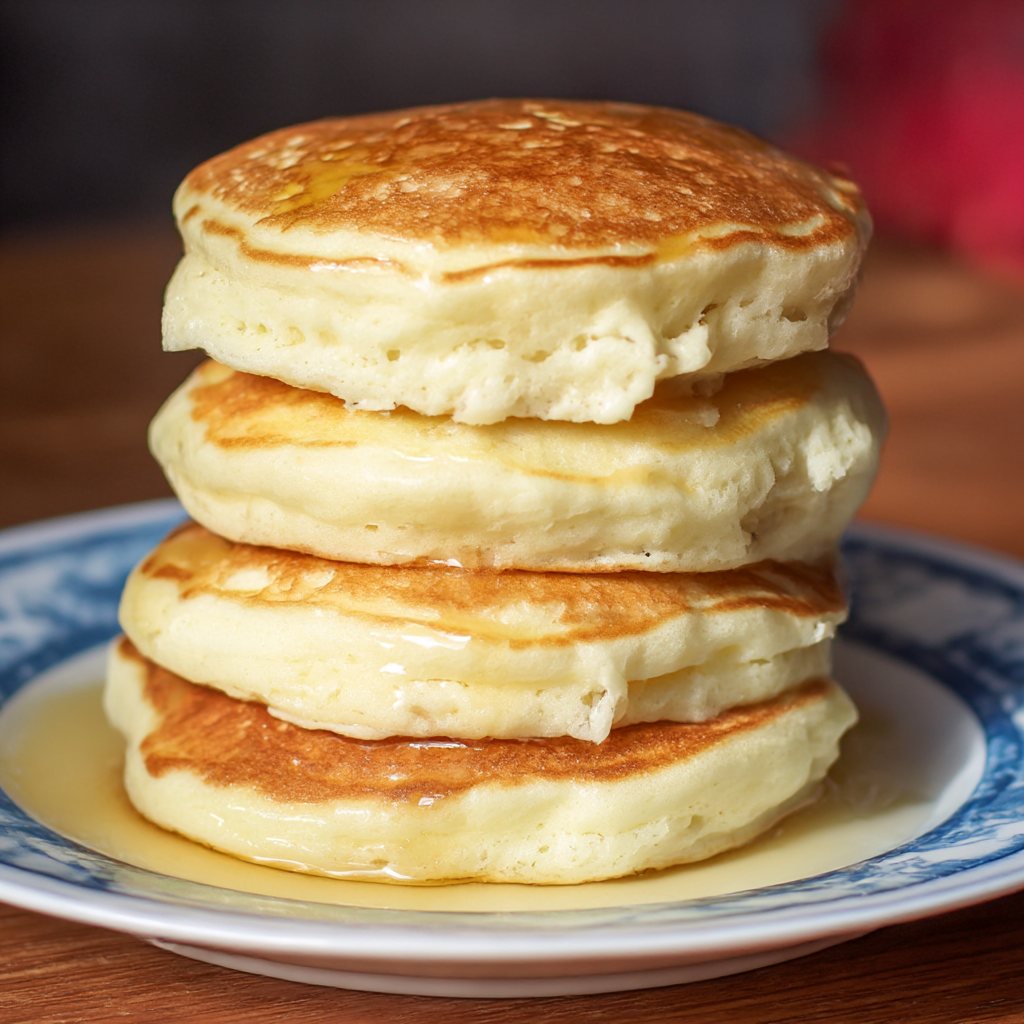
Classic Fluffy Pancakes deliver tender, cake-like texture with golden-brown surfaces that soak up syrup beautifully while maintaining their soft interior. This straightforward recipe uses simple pantry ingredients and minimal mixing to create the breakfast staple that defines weekend mornings for families around the world.
Why You’ll Love This Recipe
Quick and Easy – From mixing bowl to plate in under 15 minutes, these pancakes provide homemade quality without significant time investment or complicated techniques.
Tender, Fluffy Texture – Proper mixing technique and baking powder create light, airy pancakes that are never dense or rubbery like over-mixed versions.
Kid-Favorite Breakfast – Children universally love pancakes, making this recipe valuable for ensuring breakfast gets eaten without battles or negotiations.
Customizable Additions – The basic batter accepts countless mix-ins from chocolate chips to blueberries, allowing personalization for different family preferences.
Budget-Friendly – Simple ingredients that most kitchens already have make these pancakes economical for feeding families without expensive specialty items.
Freezer-Friendly – Make extra pancakes and freeze them for quick weekday breakfasts that microwave or toast perfectly, providing homemade convenience.
Ingredients You’ll Need
Dry Ingredients:
1 cup plain flour (120g) – provides the structure and body that creates pancakes’ tender crumb and supports their shape during cooking
1½ teaspoons baking powder (6g) – creates the chemical leavening that makes pancakes rise and become fluffy rather than flat and dense
2 tablespoons sugar (25g) – adds subtle sweetness and promotes browning that creates those characteristic golden spots on the surface
Pinch of salt – enhances all flavors and strengthens gluten structure slightly while balancing the sweetness
Wet Ingredients:
1 large egg – provides structure, richness, and helps bind ingredients while contributing to the tender texture through its fats and proteins
¾ cup milk (180ml) – adds moisture and creates steam during cooking that helps pancakes rise while contributing to browning
1 tablespoon melted butter or oil (15ml) – contributes richness and flavor while creating tender texture by coating flour proteins
1½ teaspoons vanilla extract (7ml) – enhances overall flavor with aromatic sweetness that makes plain pancakes taste special
Step-by-Step Instructions
Combine Dry Ingredients
In a medium mixing bowl, whisk together the flour, baking powder, sugar, and salt until evenly combined, then set this bowl aside while you prepare the wet ingredients.
Mix Wet Ingredients
In a separate bowl or large measuring cup, whisk together the egg, milk, melted butter, and vanilla extract until the mixture is smooth and the egg is fully incorporated without any streaks.
Gently Combine
Pour the wet ingredients into the bowl with the dry ingredients and stir gently with a wooden spoon or spatula just until combined, stopping while small lumps still remain throughout the batter without attempting to smooth them out.
Preheat and Grease Pan
Heat a non-stick skillet or griddle over medium-low heat and lightly grease with butter or cooking spray, ensuring the entire cooking surface is covered but not pooling with excess fat.
Cook Pancakes
Drop approximately 1 tablespoon of batter onto the hot pan for each pancake, spacing them apart to allow for spreading, then cook for 1-2 minutes until bubbles form across the surface and edges look set.
Flip and Finish
Use a thin spatula to flip each pancake carefully in one smooth motion, then cook the second side for 30-60 seconds until golden brown and cooked through completely.
Serve Warm
Transfer cooked pancakes to plates and serve immediately while warm, or keep in a 200°F oven until the entire batch is ready for serving together.
Recipe Notes & Tips
Don’t Overmix – Stir just until ingredients barely combine; lumpy batter is correct and creates tender pancakes, while smooth batter from overmixing develops too much gluten and creates tough, rubbery results.
Resting Time – Let mixed batter rest for 5 minutes before cooking to allow flour to hydrate fully and gluten to relax, creating more tender final texture.
Temperature Control – Medium-low heat ensures pancakes cook through without burning; if they’re browning too quickly on the outside while remaining raw inside, reduce heat.
Even Cooking – Pour batter from the same height and in the same circular motion for consistent pancake size and shape that cooks evenly.
Bubble Indicator – Wait until bubbles form across the entire surface and begin to pop before flipping; premature flipping creates uneven cooking.
Room Temperature Ingredients – Use room temperature egg and milk for better mixing and more consistent cooking compared to cold ingredients straight from the refrigerator.
Nutritional Information
Prep Time: 5 minutes
Cook Time: 10-15 minutes (depending on batch size)
Total Time: 15-20 minutes
Yield: 8-10 small pancakes or 4-5 large pancakes
Calories: Approximately 80-100 calories per small pancake (without toppings)
Perfect Pairings
Pure Maple Syrup – Drizzle with real maple syrup and a pat of butter for the classic presentation that never disappoints.
Fresh Berries – Top with fresh strawberries, blueberries, or sliced bananas for fruit flavor and nutrition that balances the carbohydrates.
Whipped Cream – Add a dollop of freshly whipped cream for special occasions when you want breakfast to feel like dessert.
Beef Bacon and Eggs – Serve alongside crispy beef bacon and scrambled eggs for a complete breakfast with protein to balance the pancakes.
Ideal Occasions
Weekend Family Breakfasts – These pancakes make Saturday or Sunday morning feel special without requiring early waking or extensive preparation.
Birthday Breakfasts – Start birthday celebrations with pancakes decorated with candles, making the first meal of the day part of the festivities.
Breakfast for Dinner – Serve these comforting pancakes for easy weeknight dinners when you need something quick that everyone will eat happily.
Sleepover Mornings – Impress overnight guests with homemade pancakes that smell amazing and taste better than any restaurant version.
Storage & Serving Tips
Keeping Warm – Place cooked pancakes on a wire rack in a 200°F oven to stay warm without becoming soggy while you finish the batch.
Freezing Instructions – Cool pancakes completely, separate with parchment paper, then freeze in freezer bags for up to 2 months for quick future breakfasts.
Reheating Methods – Toast frozen pancakes directly in a toaster for crispy edges, or microwave briefly for soft, warm pancakes in seconds.
Make-Ahead Batter – Mix dry ingredients the night before and store covered; in the morning, just add wet ingredients and cook fresh.
Creative Variations to Try
Blueberry Pancakes – Gently fold fresh or frozen blueberries into the batter just before cooking for fruity bursts in every bite.
Chocolate Chip Pancakes – Sprinkle mini chocolate chips onto the batter immediately after pouring onto the pan for melty chocolate throughout.
Whole Wheat Pancakes – Replace half the all-purpose flour with whole wheat flour for nuttier flavor and additional fiber and nutrients.
Banana Pancakes – Mash one ripe banana and fold into the wet ingredients for natural sweetness and moisture that creates extra tender pancakes.
Troubleshooting Common Issues
Dense, rubbery pancakes – This comes from overmixing the batter; stir just until ingredients barely combine, leaving plenty of lumps for tender results.
Burning on outside, raw inside – Your heat is too high; reduce to medium-low and cook slightly longer, allowing heat to penetrate fully before exterior burns.
Flat, not fluffy – Check baking powder freshness (test by adding to hot water—it should fizz vigorously), and don’t overmix, which deflates the batter.
Sticking to pan – Ensure pan is properly greased and fully preheated; non-stick pans still need light greasing for best results.
Why This Recipe Works
Classic Fluffy Pancakes succeed through the careful balance of ingredients and minimal mixing that creates tender texture. Baking powder releases carbon dioxide gas when mixed with liquid and again when heated, creating bubbles that expand during cooking and make pancakes rise. The relatively thick batter holds these bubbles rather than letting them escape, while also preventing excessive spreading that would create thin, crepe-like results. Using just enough fat coats flour proteins and prevents excessive gluten development that would create toughness. The small amount of sugar promotes Maillard browning that creates golden color and slightly sweet, toasted flavor on the surface. Leaving lumps in the batter ensures minimal gluten development—smoothing out lumps requires extended stirring that develops gluten strands and creates chewy rather than tender texture. Cooking over medium-low heat allows time for the centers to cook through before exteriors burn, while also creating even browning. The egg provides structure that prevents pancakes from falling apart while contributing to tender crumb through its emulsifying properties. At 80-100 calories per small pancake, these provide reasonable portions that become a balanced breakfast when paired with protein and fruit.
Final Thoughts
Classic Fluffy Pancakes prove that sometimes the most basic recipes are also the most essential and beloved. The simplicity of preparation makes these pancakes accessible for even novice cooks, while the reliable results build confidence and create positive cooking experiences. Making pancakes from scratch costs pennies per serving while delivering far superior flavor and texture compared to mixes that often contain unnecessary additives. While certainly a weekend or special occasion breakfast rather than rushed weekday fare, the ability to freeze extras extends their value and creates quick, homemade breakfast options for busy mornings. The universal appeal across ages and the countless variation possibilities make pancakes a foundational recipe worth mastering for creating memorable breakfast experiences that bring families together around the table.
Delicate French Crepes
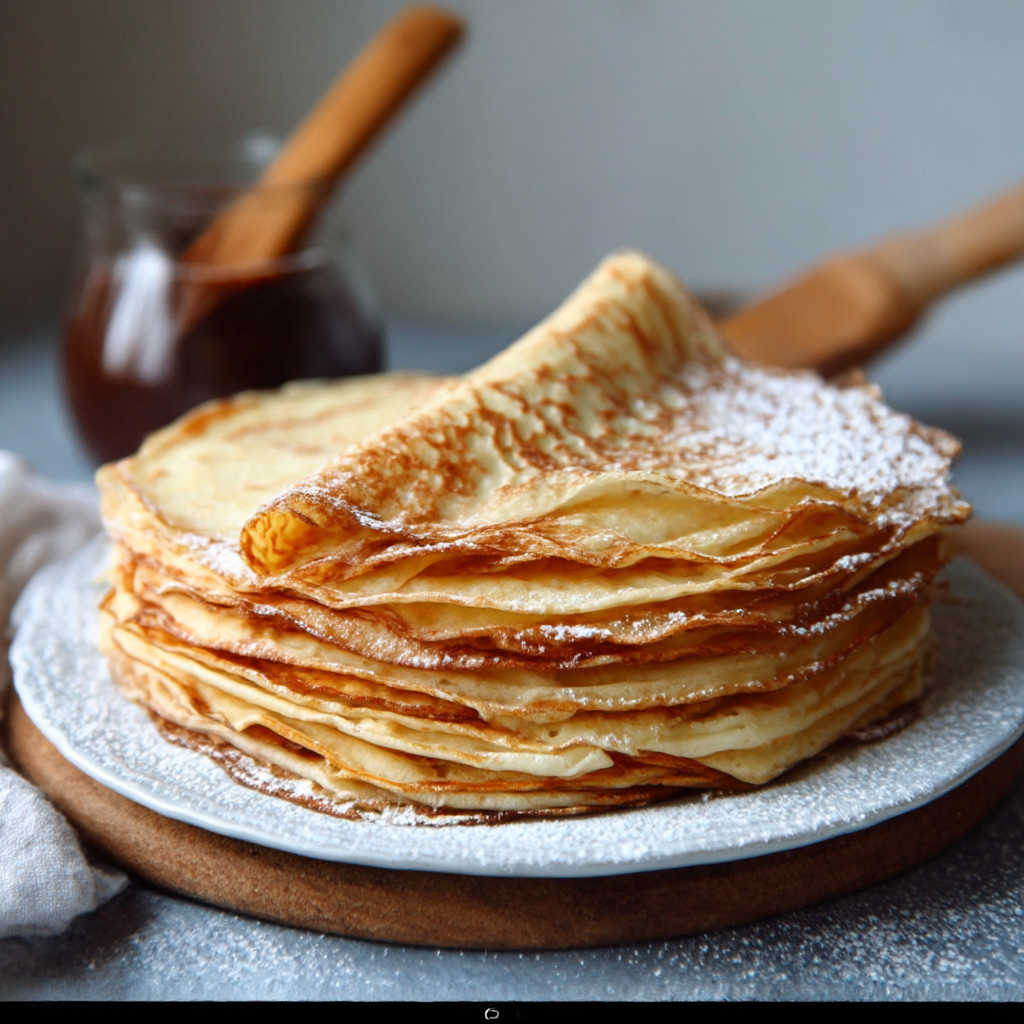
Delicate French Crepes feature paper-thin, lacy pancakes with slightly crispy edges and tender centers that fold easily around sweet or savory fillings. This elegant breakfast option requires nothing more than a simple batter and proper pan technique to create the sophisticated results associated with French cafés and bistros.
Why You’ll Love This Recipe
Elegant and Impressive – These thin, delicate crepes look professionally made and impress guests despite requiring only basic ingredients and straightforward technique.
Versatile Applications – Serve crepes sweet with Nutella and bananas or savory with cheese and vegetables, making them appropriate for breakfast, lunch, or dessert.
Simple Ingredients – Flour, eggs, milk, and butter transform into sophisticated results, proving that elegant doesn’t require exotic or expensive components.
Make-Ahead Friendly – Prepare crepes in advance and stack with parchment between layers, then simply reheat and fill when ready to serve.
Lighter Than Pancakes – The thin, delicate texture feels less heavy than traditional pancakes while still providing satisfying substance when filled and folded.
Fun Technique – Swirling batter to coat the pan creates an engaging cooking process that’s enjoyable to master and impressive to demonstrate.
Ingredients You’ll Need
Dry Ingredients:
1 cup plain flour (120g) – provides the gluten structure that creates crepes’ tender yet sturdy texture that folds without tearing
½ teaspoon salt (3g) – enhances all flavors and strengthens the gluten network slightly, helping crepes hold together
Wet Ingredients:
2 large eggs, room temperature – contributes structure, richness, and helps create the thin batter that spreads easily when swirled in the pan
1 cup warm milk (240ml) – creates the liquid base that thins the batter to proper consistency for spreading into paper-thin crepes
3 tablespoons melted butter (45g) – adds richness, flavor, and fat that creates tender texture while preventing sticking during cooking
¼ cup water (60ml) – further thins the batter to achieve the perfect consistency for ultra-thin crepes that cook quickly
For Cooking:
2 tablespoons oil (30ml) – provides the cooking medium for greasing the pan between crepes to prevent sticking
Step-by-Step Instructions
Mix Dry Ingredients
In a large mixing bowl, whisk together the flour and salt until evenly combined, creating a uniform base that will incorporate smoothly with wet ingredients.
Add Eggs and Milk
Add the eggs to the flour mixture and whisk together, then slowly pour in the warm milk while whisking continuously to prevent lumps from forming, creating a smooth, cohesive batter.
Complete the Batter
Stir in the melted butter and water, whisking until the batter is completely smooth with no lumps remaining and has a consistency similar to heavy cream that will spread easily in the pan.
Heat and Grease Pan
Heat an 8-10 inch non-stick skillet or crepe pan over medium heat and lightly grease with a small amount of oil, wiping out excess with a paper towel so only a thin film remains.
Cook First Side
Pour approximately ¼ cup of batter into the center of the hot pan, then immediately lift the pan off the heat and swirl in a circular motion to spread the batter in a thin, even layer that covers the entire bottom surface.
Monitor and Flip
Return the pan to heat and cook for 1-2 minutes until the edges begin to lift away from the pan and the bottom turns golden, then use a thin spatula or your fingers to carefully flip the crepe to the second side.
Finish Cooking
Cook the second side for just 30-40 seconds until set and lightly golden, then slide the crepe onto a plate and repeat with remaining batter, stacking finished crepes with parchment paper between layers.
Serve or Fill
Serve crepes warm, either filled with your choice of sweet or savory ingredients and folded into quarters or rolled into cylinders for elegant presentation.
Recipe Notes & Tips
Batter Consistency – The batter should be thin like heavy cream; if too thick, add more water or milk gradually until it reaches the right consistency for spreading.
Room Temperature Eggs – Using room temperature eggs prevents the melted butter from solidifying when added, ensuring smooth batter without butter lumps.
Resting Time – Let batter rest for 30 minutes before cooking if possible, allowing flour to hydrate fully and gluten to relax for more tender crepes.
Pan Temperature – Medium heat works best; too hot causes burning before crepes set, while too cool prevents proper browning and makes flipping difficult.
Swirling Technique – Lift the pan completely off the heat while swirling to control the spread without overcooking, creating thin, even crepes.
First Crepe Throwaway – The first crepe often doesn’t turn out perfect as the pan seasons; don’t be discouraged if you need to discard it and continue.
Nutritional Information
Prep Time: 10 minutes (plus optional 30-minute resting time)
Cook Time: 15-20 minutes (for 8-10 crepes)
Total Time: 25-60 minutes (depending on resting)
Yield: 8-10 crepes (depending on pan size)
Calories: Approximately 100-120 calories per plain crepe (before fillings)
Perfect Pairings
Nutella and Banana – Spread with Nutella and sliced bananas, then fold for a classic sweet combination that’s beloved worldwide.
Lemon and Sugar – Sprinkle with fresh lemon juice and granulated sugar, then roll for a simple, traditional French preparation.
Berry Compote – Fill with warm mixed berry compote and top with whipped cream for an elegant, fruity dessert-style breakfast.
Savory Ham and Cheese – Fill with sliced ham and Gruyère cheese, fold into squares, and warm until cheese melts for a French bistro breakfast.
Ideal Occasions
Brunch Entertaining – These elegant crepes impress guests at brunch gatherings, making the meal feel special and French-inspired.
Valentine’s Day Breakfast – Prepare heart-shaped crepes or romantic fillings for a special morning that starts the celebration perfectly.
Mother’s Day – Serve Mom breakfast in bed with beautiful crepes filled with her favorite combinations for a thoughtful, homemade treat.
Casual Weekends – Make a batch on relaxed weekends when you have time to enjoy the process and experiment with different fillings.
Storage & Serving Tips
Stacking Crepes – Place parchment or wax paper between cooked crepes to prevent sticking when stacking, making them easy to separate later.
Refrigerator Storage – Store stacked crepes wrapped in plastic wrap in the refrigerator for up to 3 days, reheating briefly before filling and serving.
Freezer Storage – Freeze crepes with parchment between each one in freezer bags for up to 2 months, thawing at room temperature before use.
Reheating Methods – Warm crepes in a dry pan over low heat for 10-15 seconds per side, or microwave briefly between damp paper towels.
Creative Variations to Try
Chocolate Crepes – Add 2 tablespoons cocoa powder to the dry ingredients for chocolate crepes that pair beautifully with vanilla or berry fillings.
Buckwheat Crepes – Replace half the flour with buckwheat flour for authentic French galettes with nutty flavor perfect for savory fillings.
Orange Crepes – Add zest of one orange and 1 tablespoon orange juice to the batter for citrus-scented crepes that complement chocolate or berry fillings.
Cinnamon Crepes – Mix 1 teaspoon cinnamon into the flour for warm, spiced crepes that work wonderfully with apple or caramel fillings.
Troubleshooting Common Issues
Crepes tearing when flipped – Batter may be too thin or pan too hot; thicken batter slightly with more flour and reduce heat.
Thick, cake-like texture – Batter is too thick; thin with additional milk or water until it reaches heavy cream consistency that spreads easily.
Sticking to pan – Pan isn’t properly greased or seasoned; use more oil and ensure it’s properly heated before adding batter.
Uneven thickness – Swirl the pan immediately after adding batter before it sets, and use consistent amount of batter for each crepe.
Why This Recipe Works
Delicate French Crepes succeed through the combination of thin batter and proper pan technique that creates large surface area with minimal thickness. The high ratio of liquid to flour creates a batter thin enough to spread into paper-thin layers rather than thick, cake-like pancakes. Eggs provide structure through their proteins that coagulate during cooking, creating a network strong enough to hold the crepe together despite its thinness. The butter contributes richness and creates tender texture by coating flour proteins and preventing excessive gluten development. Warm milk helps the butter incorporate smoothly while also ensuring the batter stays fluid and spreadable. Cooking over medium heat allows the bottom to set and brown before the top dries out, creating the characteristic golden spots while maintaining pliability for folding. The swirling technique distributes batter evenly in a thin layer, while the quick cooking time prevents moisture loss that would make crepes brittle. The minimal thickness means crepes cook through quickly without needing flipping until the first side is set, preventing tearing. At 100-120 calories per plain crepe, these provide a lighter base compared to pancakes, with final calorie count depending heavily on chosen fillings.
Final Thoughts
Delicate French Crepes demonstrate that sophisticated, café-quality results are achievable at home with basic ingredients and proper technique. The thin, elegant nature of crepes makes them feel special and European, elevating breakfast beyond everyday fare into something memorable and impressive. While requiring slightly more attention than standard pancakes due to the swirling technique, the process becomes intuitive with practice and creates an engaging cooking experience. The versatility of crepes—equally appropriate for sweet or savory applications—makes them valuable for various meals and occasions beyond breakfast alone. Making crepes from scratch costs very little while producing results that rival anything from specialty breakfast restaurants, proving that quality doesn’t require significant financial investment. The make-ahead capability extends their practicality, allowing preparation when convenient and quick assembly when needed, making elegant breakfast accessible even on busy mornings when time is limited.
Final Thoughts on the Collection
These four breakfast recipes—Fluffy Waffles, Crispy Churros, Classic Pancakes, and Delicate Crepes—represent diverse approaches to transforming simple batters into memorable morning meals. From the crispy-fluffy contrast of waffles to the fried indulgence of churros, the comforting familiarity of pancakes to the elegant delicacy of crepes, each recipe offers distinct textures, techniques, and serving possibilities that ensure breakfast never becomes boring.
The collection spans a range of complexity, time investment, and occasion-appropriateness. Quick pancakes suit busy weekend mornings, while churros require more attention but deliver carnival excitement. Waffles create special occasions with their distinctive shape and texture, while crepes bring French café elegance to home kitchens. This variety ensures you’ll find the right recipe for any mood, schedule, or celebration.
What unites these recipes is their reliance on basic pantry ingredients—flour, eggs, milk, sugar, and fat—transformed through different techniques into dramatically varied results. This demonstrates fundamental cooking principles about how technique impacts outcome as much as ingredients do, teaching valuable lessons applicable far beyond breakfast foods.
Whether you crave the crispy satisfaction of waffles, the sweet indulgence of sugar-coated churros, the comforting familiarity of fluffy pancakes, or the elegant sophistication of paper-thin crepes, this collection provides reliable recipes that deliver delicious results while creating the kind of weekend breakfast memories that families treasure for years to come.