This effortless dessert combines the beloved flavors of strawberry cheesecake with the convenience of dump cake technique by layering sweet strawberry pie filling, tangy cream cheese mixture, dry cake mix, and melted butter in a simple baking dish. The magic happens in the oven as the layers transform into a golden, bubbly dessert with fruity bottom, creamy middle, and crispy cake-like topping, delivering bakery-quality results with minimal effort and no mixing of cake batter required.
Why You’ll Love This Recipe
- Dump Cake Simplicity – Requires no mixing of cake batter or complicated technique; simply layer ingredients in order and let the oven do all the work while you relax.
- Cheesecake Without the Fuss – Delivers authentic cheesecake flavor through a simple cream cheese layer without the stress of water baths, springform pans, or cracking concerns.
- Strawberry Season Perfect – Showcases strawberry flavor beautifully through convenient pie filling, making this achievable year-round without worrying about berry seasonality or quality.
- Beginner-Friendly Success – Truly easy skill level with straightforward layering technique that’s virtually impossible to mess up, perfect for those new to baking.
- Crowd-Pleasing Portions – Yields 12 generous servings from a single 9×13 pan, making this ideal for potlucks, family gatherings, or any time you need dessert for many.
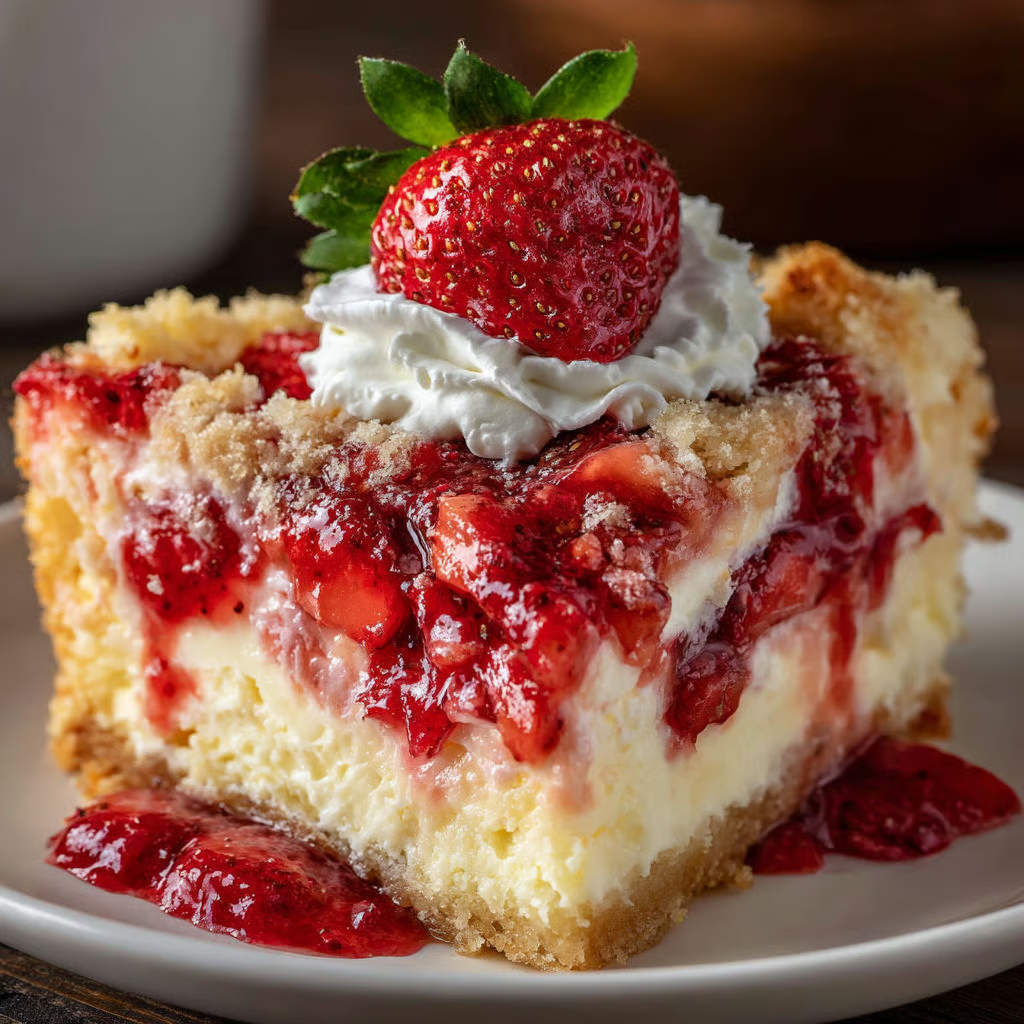
- Textural Variety – Creates three distinct layers in every bite—soft fruit bottom, creamy cheesecake center, crispy cake topping—providing dynamic eating experience despite simple preparation.
Ingredients You’ll Need
For the Cake Base:
- 1 box (15.25 oz) yellow or white cake mix – Forms the crispy, golden topping; yellow adds buttery richness while white provides neutral sweetness
- 1 can (21 oz) strawberry pie filling – Creates the fruity foundation; use quality brands like Comstock or Duncan Hines for best berry distribution
For the Cheesecake Layer:
- 8 oz cream cheese, softened – Provides the tangy, creamy cheesecake element; must be room temperature for smooth spreading
- ½ cup granulated sugar – Sweetens the cream cheese layer to proper cheesecake sweetness level
- 1 tsp vanilla extract – Enhances the cream cheese flavor with aromatic, sweet vanilla notes
For the Topping:
- ½ cup (1 stick) unsalted butter, melted – Creates the moisture that transforms dry cake mix into tender, crispy topping; salted butter works but reduces control over final saltiness
Step-by-Step Instructions
Preheat and Prepare Preheat your oven to 350°F (175°C) and position a rack in the center. Lightly grease a 9×13-inch baking dish with nonstick cooking spray or a thin coating of butter, making sure to coat the bottom and sides to prevent sticking and ensure easy serving.
Create the Strawberry Base Open the can of strawberry pie filling and pour the entire contents into the prepared baking dish. Use a spatula to spread the filling evenly across the bottom, creating a uniform layer from edge to edge. The pie filling should cover the entire bottom with strawberries and their thick, glossy sauce distributed relatively evenly.
Prepare the Cream Cheese Mixture In a medium mixing bowl, combine the softened cream cheese, granulated sugar, and vanilla extract. Using a hand mixer on medium speed (or a stand mixer fitted with the paddle attachment), beat the mixture for 2-3 minutes until completely smooth, creamy, and lump-free—scrape down the sides of the bowl as needed to ensure everything incorporates evenly.
Add the Cheesecake Layer Drop large dollops of the cream cheese mixture across the surface of the strawberry layer, spacing them relatively evenly—you’ll have 8-10 generous spoonfuls. Using an offset spatula or the back of a spoon, gently spread the cream cheese to create a relatively even layer over the strawberries, taking care not to disturb the fruit layer too much. It doesn’t need to be perfectly smooth or completely cover every inch; gaps are fine as the cream cheese will spread slightly during baking.
Apply Dry Cake Mix Open the box of cake mix and sprinkle the entire contents evenly over the cream cheese layer, distributing it uniformly from edge to edge. This is crucial: do not stir, mix, or press the cake mix into the layers below. It should remain a completely dry, powdery layer sitting on top—this dry layer is what will transform into the cake-like topping when the butter is added.
Pour Melted Butter Melt the butter in the microwave or in a small saucepan on the stovetop until completely liquefied. Drizzle the melted butter evenly over the entire surface of the dry cake mix, moving in a back-and-forth pattern to ensure maximum coverage. You want to coat as much of the dry mix as possible—the butter activates the leavening agents in the cake mix and creates the golden, crispy topping. Some dry spots are inevitable and acceptable, but aim for about 80-90% coverage.
Bake Until Golden Place the baking dish on the center oven rack and bake uncovered for 40-45 minutes, checking at the 40-minute mark. The dump cake is done when the topping has turned deep golden brown and looks slightly crispy on top, the edges are bubbling vigorously with fruit filling, and a toothpick inserted into the topping comes out clean or with just moist crumbs. The strawberry filling will be bubbling up around the edges, creating appetizing caramelization.
Cool Before Serving Remove the baking dish from the oven and place it on a wire rack or heat-safe surface. Let the dump cake cool for 10-15 minutes before serving—this brief cooling period allows the layers to set slightly and makes portioning easier while everything is still warm and delicious. Serve warm for maximum gooey texture, or refrigerate and serve cold for firmer, more defined layers with cheesecake-like consistency.
Recipe Notes & Tips
- Cream Cheese Temperature – Leaving cream cheese at room temperature for 1-2 hours ensures smooth mixing; if you forget, microwave in 10-second bursts at 30% power until soft but not melted.
- Butter Distribution – Pour the melted butter slowly and methodically rather than dumping it all in one spot; even distribution ensures even topping texture without raw, dry patches.
- Cake Mix Variations – Strawberry cake mix creates more intense berry flavor; vanilla or French vanilla adds richness; even chocolate works for chocolate-covered strawberry effect.
- Pie Filling Alternatives – Cherry, blueberry, peach, or apple pie filling all work beautifully with the same technique; mix two different fillings for creative combinations.
- Make-Ahead Possibility – This dessert actually improves when made several hours ahead or even overnight, as the layers meld together and the topping softens slightly.
- Serving Temperature – Delicious both warm and cold; warm emphasizes the fruity, gooey qualities while cold accentuates the cheesecake characteristics.
Nutritional Information
Prep Time: 15 minutes
Cook Time: 45 minutes
Total Time: 60 minutes
Servings: 12 servings
Calories: Approximately 330 calories per serving (based on standard cake mix and full-fat cream cheese)

Perfect Pairings
- Vanilla Ice Cream – Serve warm dump cake topped with a scoop of vanilla ice cream that melts into the warm layers for ultimate indulgence.
- Whipped Cream – Add a generous dollop of freshly whipped cream or Cool Whip for lighter, fluffier topping than ice cream provides.
- Fresh Strawberries – Garnish individual servings with fresh sliced strawberries for color, freshness, and reinforcement of the strawberry theme.
- Hot Coffee – Pair with strong, hot coffee that balances the sweetness and provides warming contrast to cold or room-temperature servings.
Ideal Occasions
- Potluck Perfection – Ideal for bringing to gatherings where you need reliable, crowd-pleasing dessert that travels well and serves many from one pan.
- Summer Barbecues – Perfect for outdoor entertaining when you want impressive dessert without heating up the kitchen all day or managing complicated preparations.
- Mother’s Day Brunch – Excellent choice for celebrating mom with strawberry-cheesecake flavors she’ll love without requiring professional baking skills.
- Beginner Baking – Outstanding first baking project for those learning to cook who need confidence-building success with minimal room for error.
Storage & Serving Tips
- Refrigerator Storage – Cool completely, cover tightly with plastic wrap or foil, and refrigerate for up to 4 days; the dessert firms up when cold and takes on more cheesecake-like texture.
- Room Temperature Holding – Can sit at room temperature for about 2 hours after baking; beyond that, refrigerate to prevent spoilage due to cream cheese content.
- Reheating Instructions – Warm individual portions in the microwave for 30-45 seconds, or reheat the entire pan covered with foil at 325°F for 15-20 minutes.
- Freezing Possibility – Freeze completely cooled, tightly wrapped dump cake for up to 2 months; thaw overnight in refrigerator and serve cold or reheat gently.
Creative Variations to Try
- Triple Berry Delight – Use mixed berry pie filling and add fresh blueberries and raspberries scattered over the strawberry layer for more complex fruit flavor.
- Lemon Cheesecake – Add 1 tablespoon lemon zest to the cream cheese mixture and use lemon cake mix for bright, citrusy variation.
- Chocolate Strawberry – Use chocolate cake mix and add chocolate chips scattered over the strawberry layer for chocolate-covered strawberry effect.
- Peaches and Cream – Replace strawberry with peach pie filling and add ½ teaspoon cinnamon to the cream cheese for Southern-inspired twist.
Troubleshooting Common Issues
- Soggy Topping – Not enough butter or butter wasn’t distributed evenly; make sure to coat at least 80% of the dry cake mix surface with melted butter.
- Raw Cake Mix Spots – Insufficient butter coverage or uneven distribution; next time, drizzle butter more methodically and consider using slightly more butter (6 tablespoons instead of 4).
- Runny Center – Didn’t bake long enough or cream cheese layer was too thin; ensure the full 40-45 minute baking time and spread cream cheese more generously.
- Burnt Top – Oven running hot or positioned too close to heating element; tent with foil if browning too quickly and verify oven temperature with thermometer.
Why This Recipe Works
This dump cake succeeds by applying clever layering that allows each component to transform during baking without any mixing or traditional cake preparation. The strawberry pie filling provides moisture and concentrated fruit flavor while its thick, starchy consistency prevents it from making the other layers soggy—the pectin-thickened filling holds its structure during the extended baking time. The cream cheese mixture creates an authentic cheesecake layer that firms up during baking due to the eggs present in the cake mix above it, which drip down slightly and help set the cream cheese without requiring a traditional cheesecake baking process. The dry cake mix layer serves as both topping and structure—when the melted butter is poured over it, the fat activates the chemical leaveners (baking powder and baking soda) in the mix, causing it to rise and bake into a tender, cake-like layer. Areas where butter pools create crispy, almost cookie-like patches, while areas with less butter remain slightly more tender, creating textural variety that’s part of dump cake’s charm. The moderate oven temperature (350°F) allows everything to bake through completely—the fruit bubbles and concentrates, the cream cheese sets without curdling, and the topping browns appealingly without burning. The brief cooling period lets the cream cheese firm up from its melted state during baking, transforming into sliceable cheesecake consistency rather than liquid cream. At 330 calories per serving, this delivers satisfying dessert indulgence in reasonable portions that won’t derail healthy eating patterns when enjoyed occasionally as part of balanced diet.
Final Thoughts
Strawberry Cheesecake Dump Cake demonstrates that impressive, delicious desserts don’t require professional baking skills, expensive equipment, or hours of complicated preparation. The easy skill level makes this genuinely accessible to anyone who can layer ingredients in a pan and operate an oven, while the consistently crowd-pleasing results ensure that even experienced bakers will appreciate having this reliable recipe for times when convenience matters most. This dessert proves that dump cakes aren’t just shortcuts but legitimate techniques that create unique textures impossible to achieve through traditional mixing methods—the crispy-tender topping with its variable texture simply can’t be replicated by conventional cake baking. Whether you’re a nervous beginner attempting your first baked dessert, a busy parent needing quick dessert for unexpected company, a potluck contributor seeking reliable crowd-pleasers, or simply someone craving the nostalgic comfort of strawberry cheesecake without the stress of traditional preparation, this versatile dump cake adapts easily to your needs while consistently delivering that perfect spoonful where sweet strawberries, tangy cream cheese, and golden cake topping come together in warm, fruity, absolutely delicious harmony.