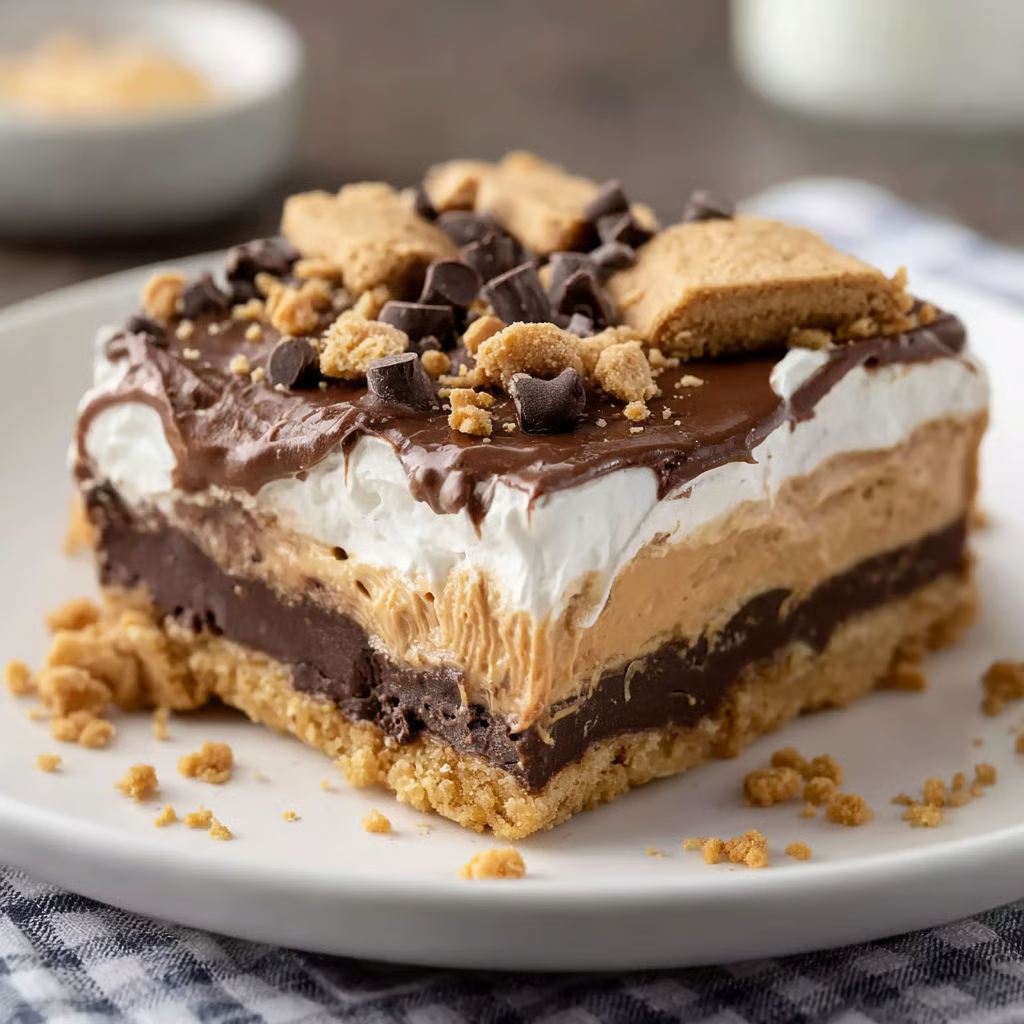
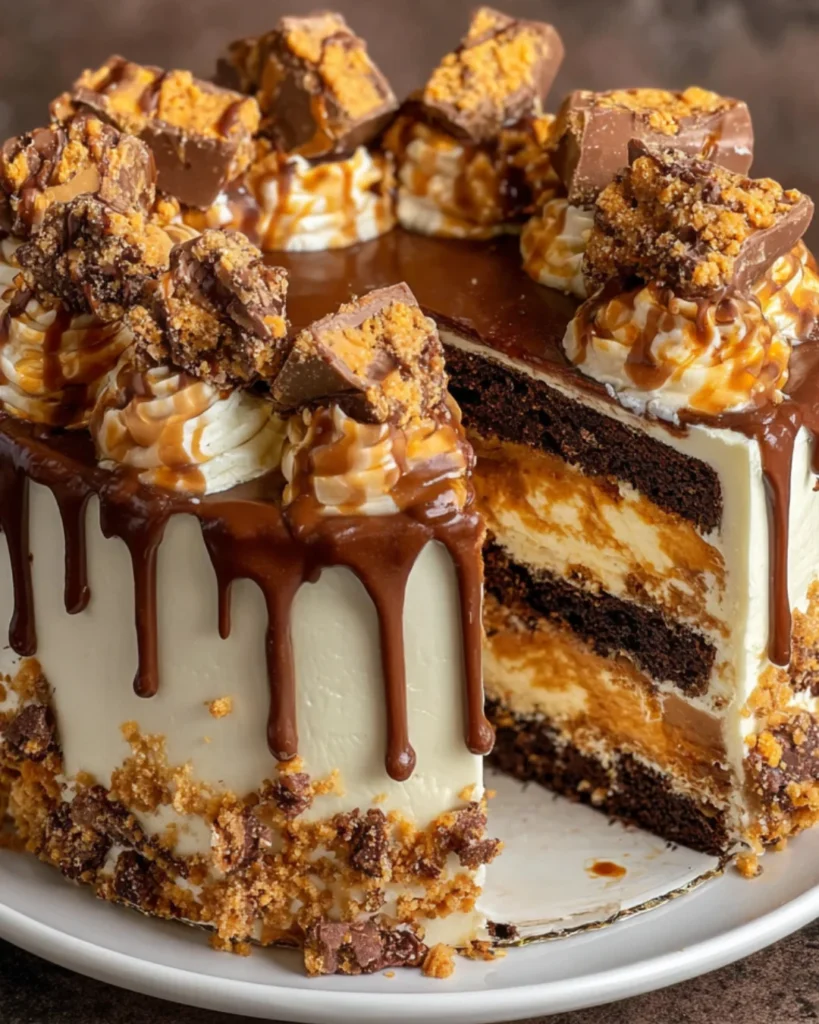
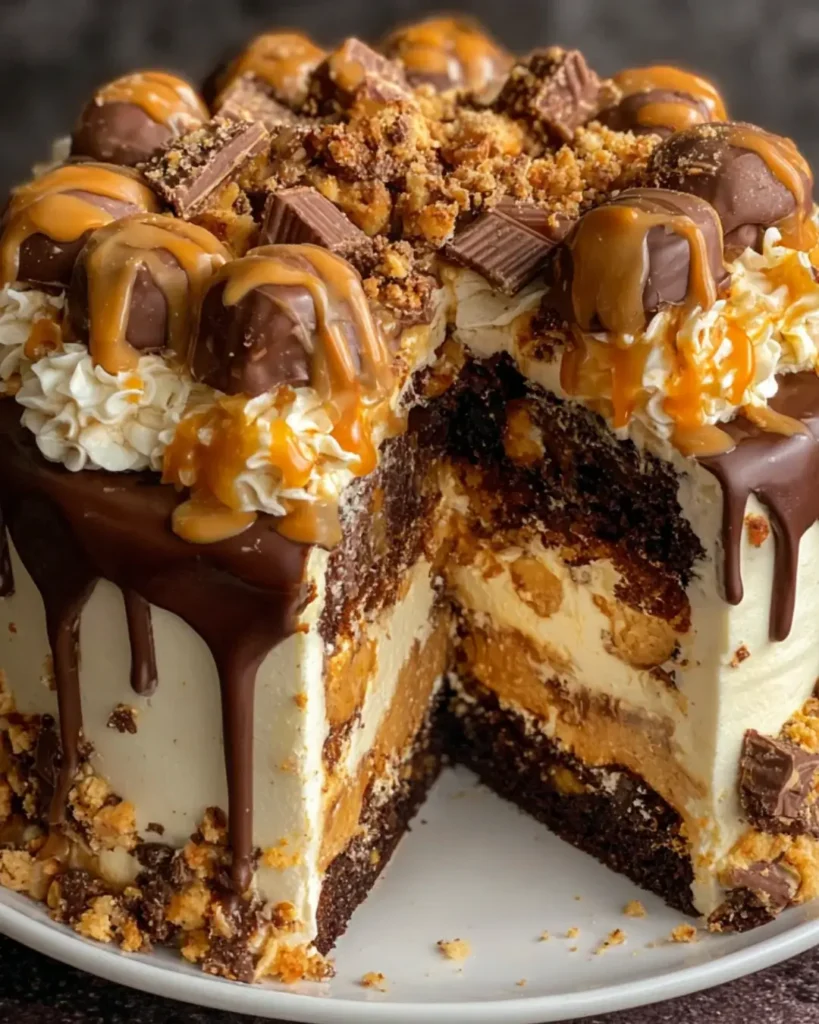
This decadent dessert is a show-stopping fusion of rich chocolate cake, creamy peanut butter mousse, and the irresistible crunch of crushed candy bars. It starts with a moist, cocoa-based sponge cake that is layered with a fluffy, peanut butter-infused whipped cream filling. Finished with a glossy coat of chocolate frosting and a generous shower of shattered Butterfinger bits, this cake delivers a perfect balance of salty, sweet, nutty, and chocolatey flavors in every forkful.
Why You’ll Love This Recipe
- Ultimate Flavor Combination – Chocolate and peanut butter are arguably the most iconic dessert duo, and this cake maximizes that pairing to its full potential.
- Contrasting Textures – The softness of the cake and the silkiness of the mousse are perfectly punctuated by the sharp, sugary crunch of the crushed toffee candy.
- Moist Cake Base – The use of boiling water in the batter ensures the chocolate cake remains exceptionally tender and moist for days.
- Bakery-Quality Presentation – Despite being easy to assemble, the height of the cake and the vibrant orange-and-chocolate topping make it look professionally made.
- Customizable Filling – The peanut butter filling is essentially a stabilized mousse, meaning it holds up well between layers without becoming too heavy or dense.
- Crowd Pleaser – It hits all the major sweet tooth cravings—chocolate, caramel/toffee, peanut butter, and cake—making it a safe bet for any party.
Ingredients You’ll Need
The Chocolate Cake Base
- 2 cups All-Purpose Flour – Provides the structure for the cake; measure by spooning and leveling to avoid a dry crumb.
- 1 ½ cups Granulated Sugar – Sweetens the cocoa and aids in creating a tender texture.
- ½ cup Unsweetened Cocoa Powder – Natural cocoa powder works best here for a deep, classic chocolate flavor.
- 1 ½ teaspoons Baking Powder & Baking Soda – Using both chemical leaveners ensures the cake rises properly despite the heavy liquid content.
- 1 teaspoon Salt – Essential to balance the sweetness and enhance the chocolate flavor.
- 2 Large Eggs – Room temperature eggs bind the batter and provide stability.
- 1 cup Whole Milk – Adds richness and moisture to the crumb.
- ½ cup Vegetable Oil – Keeps the cake soft even when refrigerated (unlike butter-based cakes which can harden).
- 2 teaspoons Vanilla Extract – Adds aromatic depth to the chocolate.
- 1 cup Boiling Water – The “secret weapon” that blooms the cocoa powder (intensifying the flavor) and creates a silky batter.
The Peanut Butter Mousse Filling
- 1 cup Creamy Peanut Butter – Use standard commercial peanut butter (like Jif or Skippy) rather than natural varieties to prevent oil separation.
- 1 cup Powdered Sugar – Sweetens and stabilizes the peanut butter mixture.
- 1 teaspoon Vanilla Extract – Enhances the nut flavor.
- 1 cup Heavy Cream – Whipped to stiff peaks, this lightens the dense peanut butter into a fluffy, spreadable mousse.
Assembly & Garnish
- 1 ½ cups Butterfinger Candy Bars – Crushed and divided. You’ll need about 1 cup for the filling layer and ½ cup for the final topping.
- 1 cup Chocolate Frosting – Store-bought saves time, but a homemade ganache or buttercream works beautifully too.
Step-by-Step Instructions
1. Prepare the Oven and Pans Preheat your oven to 350°F (175°C). Grease two 9-inch round cake pans generously with butter or cooking spray, and dust with flour (or cocoa powder) to prevent sticking. Tapping out excess flour is crucial for a clean release.
2. Mix Dry Ingredients In a large mixing bowl or the bowl of a stand mixer, whisk together the flour, granulated sugar, cocoa powder, baking powder, baking soda, and salt until uniform.
3. Incorporate Wet Ingredients Add the eggs, milk, vegetable oil, and vanilla extract to the dry mixture. Beat on medium speed for about 2 minutes. This step develops the structure of the cake, ensuring it isn’t too crumbly.
4. Bloom with Boiling Water Reduce the mixer speed to low and carefully pour in the boiling water. The batter will become very thin and liquid—this is normal. Stir gently until just combined.
5. Bake the Layers Divide the batter evenly between the two prepared pans. Bake for 30-35 minutes. Test for doneness by inserting a wooden toothpick into the center; it should come out clean or with just a few moist crumbs attached.
6. Cool Completely Let the cakes cool in the pans for 10 minutes to set. Then, invert them onto wire racks to cool completely. Note: Do not attempt to fill warm cakes, or the mousse will melt.
7. Whip the Peanut Butter Filling In a medium bowl, beat the peanut butter, powdered sugar, and vanilla extract until smooth. In a separate cold bowl, whip the heavy cream until stiff peaks form. Gently fold the whipped cream into the peanut butter mixture in two batches until no white streaks remain.
8. Assemble the Cake Place one cooled cake layer on your serving platter. Spread the peanut butter mousse thickly over the top. Sprinkle 1 cup of the crushed Butterfinger bars over the mousse, pressing them down lightly so they stick.
9. Frost and Finish Place the second cake layer on top. Cover the top and sides of the entire cake with the chocolate frosting. Finally, decorate by pressing the remaining ½ cup of crushed Butterfinger bars onto the top or sides of the cake.
Recipe Notes & Tips
- Handling the Thin Batter – Because the batter is very liquid, avoid springform pans unless they are wrapped in foil, as they may leak. Solid aluminum pans are best.
- Natural Peanut Butter Warning – Avoid “natural” peanut butters that require stirring. They often lack the stabilizers needed to keep the filling firm, which can cause the cake layers to slide.
- Crushing Candy Bars – Place the Butterfingers in a zip-top bag and smash them with a rolling pin. Leave some larger chunks for texture rather than pulverizing them into dust.
- Freezing Layers – To make assembly easier, wrap the cooled cake layers in plastic wrap and freeze them for 30 minutes. Stiff, cold cakes are much easier to frost and stack.
- Coffee Enhancement – As noted, adding a teaspoon of espresso powder to the boiling water enhances the chocolate flavor significantly without making the cake taste like coffee.
Nutritional Information
- Prep Time: 20 min
- Cook Time: 35 min (+ cooling time)
- Total Time: 1 hour 5 min
- Servings: 12 Servings
- Calories: ~580 kcal (Estimate per slice – note that while the original source lists 350, standard calculations for these ingredients suggest a higher caloric density closer to 580)
Perfect Pairings
- Cold Milk: A tall glass of cold milk is the classic palate cleanser for rich, peanut buttery desserts.
- Hot Coffee: The bitterness of black coffee or an espresso cuts through the intense sweetness of the candy and frosting.
- Vanilla Bean Ice Cream: If serving warm (or just for excess), a scoop of vanilla adds a creamy temperature contrast.
- Salted Caramel Sauce: A drizzle of salted caramel on the plate ties the toffee flavors of the Butterfinger together.
Ideal Occasions
- Birthdays: This is a high-impact “celebration cake” that looks great with candles.
- Halloween Parties: A perfect way to use up leftover fun-sized Butterfinger bars from trick-or-treating.
- Potlucks: It yields 12 generous slices, making it perfect for feeding a crowd.
- Father’s Day: The robust nutty and chocolate flavors are often a hit for Dad.
Storage & Serving Tips
- Refrigeration Required: Because the filling contains heavy cream, this cake should be stored in the refrigerator. It keeps well for up to 4 days.
- Serve Chilled or Room Temp: It is delicious cold, but letting slices sit at room temperature for 15 minutes allows the frosting and mousse to soften for better texture.
- Cover Exposed Areas: Press plastic wrap against the cut sides of the cake to keep the exposed sponge moist.
- Candy Crispness: Over time (after day 2), the crushed Butterfingers on top may absorb moisture and lose some crunch. Add fresh crumbles before serving leftovers if desired.
Creative Variations to Try
- Reese’s Version: Swap the Butterfingers for chopped Reese’s Peanut Butter Cups for a smoother, less crunchy texture.
- Chocolate Ganache: Instead of standard frosting, pour a warm dark chocolate ganache over the top for a sophisticated, glossy finish.
- Pretzel Crunch: Mix crushed pretzels into the peanut butter filling along with the candy for a “sweet and salty” boost.
- Poke Cake Style: Poke holes in the warm cake and pour sweetened condensed milk or caramel sauce over it before frosting for an ultra-moist “gooey” version.
Troubleshooting Common Issues
- Cake sunk in the middle – This usually means the oven door was opened too early or the leavening agents (baking soda/powder) were expired.
- Filling is too runny – The heavy cream wasn’t whipped to stiff peaks, or the peanut butter was too oily. Refrigerate the filling for 30 minutes to firm up before spreading.
- Frosting is tearing the cake – The cake was likely too warm when you tried to frost it. Freeze the cake briefly to harden the exterior crumbs (“crumb coat”) before final frosting.
- Batter seems too watery – Do not add more flour! Trust the process. The boiling water hydrates the cocoa and flour, and it will bake into a perfect sponge.
Why This Recipe Works
The genius of the Butterfinger Bomb Cake lies in its moisture management and flavor layering. The cake base uses the “Hershey’s style” method (boiling water), which gelatinizes the starches immediately and blooms the cocoa butter, resulting in a dark, moist crumb that doesn’t dry out. The filling uses a “mousse” technique by folding aerated cream into dense peanut butter, creating a layer that feels light on the tongue but packs a heavy flavor punch. Finally, the Butterfinger bars provide the necessary texture element—without them, the cake would be entirely soft. The toffee inside the candy adds a caramelized sugar note that bridges the gap between the savory peanut butter and the sweet chocolate.
Final Thoughts
The Butterfinger Bomb Cake is more than just a dessert; it’s a texture-rich experience that pays homage to one of America’s favorite candy bars. While it looks impressive, the techniques involved—simple mixing, whipping, and frosting—are accessible to bakers of all skill levels. It is an unapologetically rich treat, perfect for those times when only the combination of chocolate, peanut butter, and crunch will satisfy. Prepare to be asked for the recipe after the first bite!