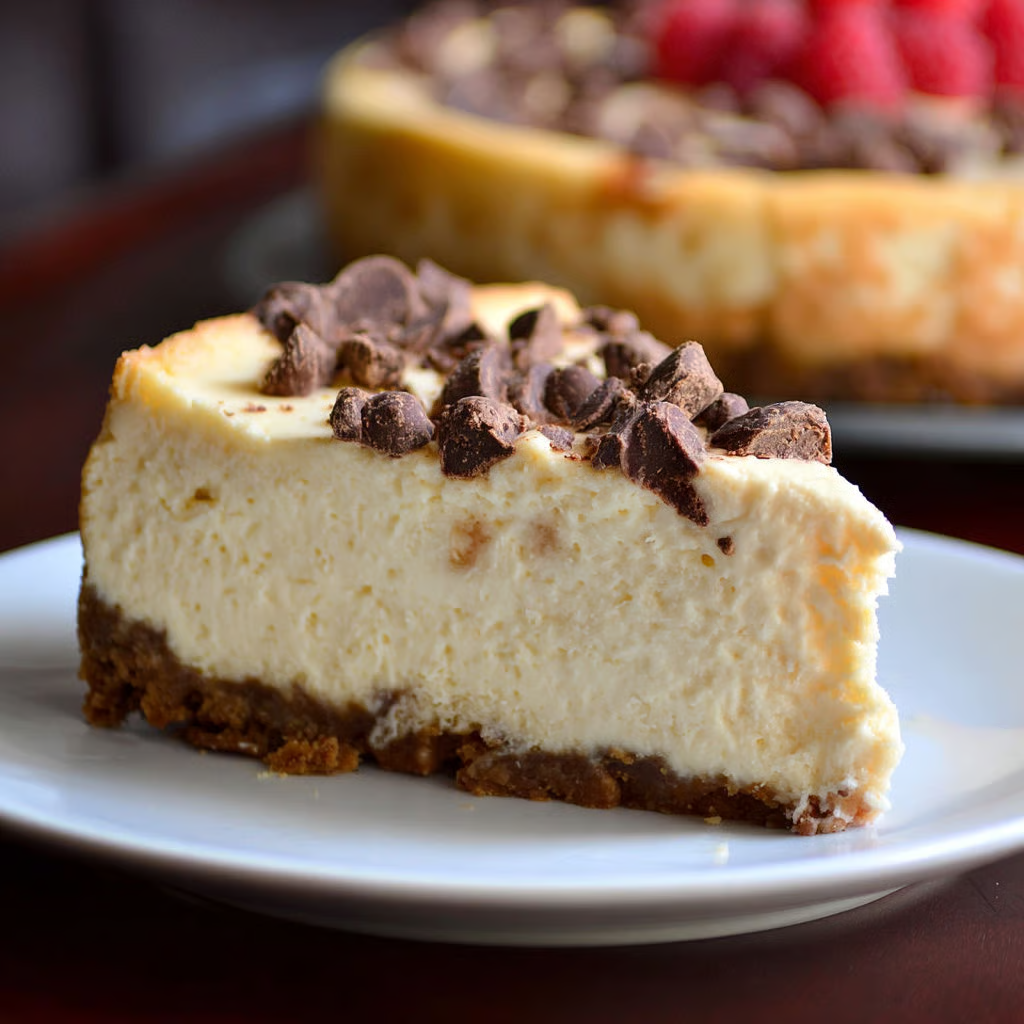
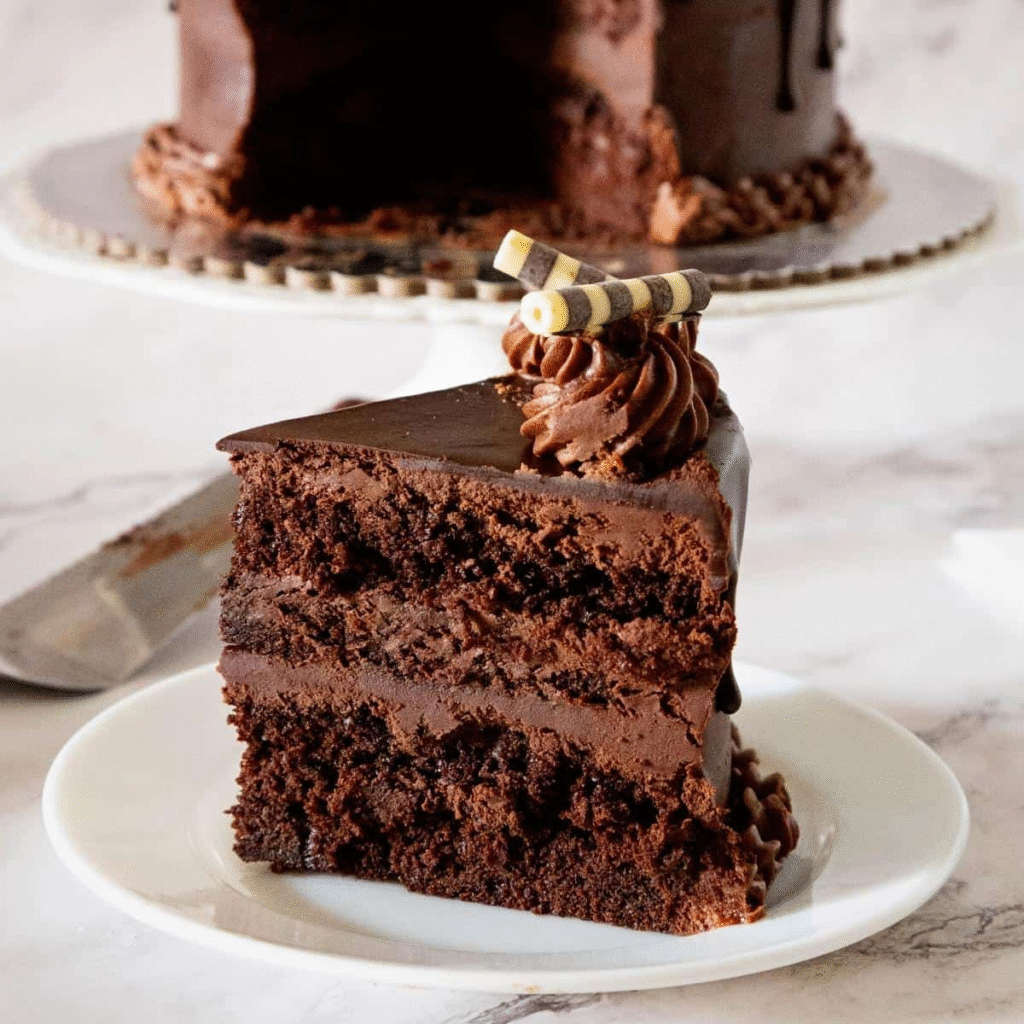
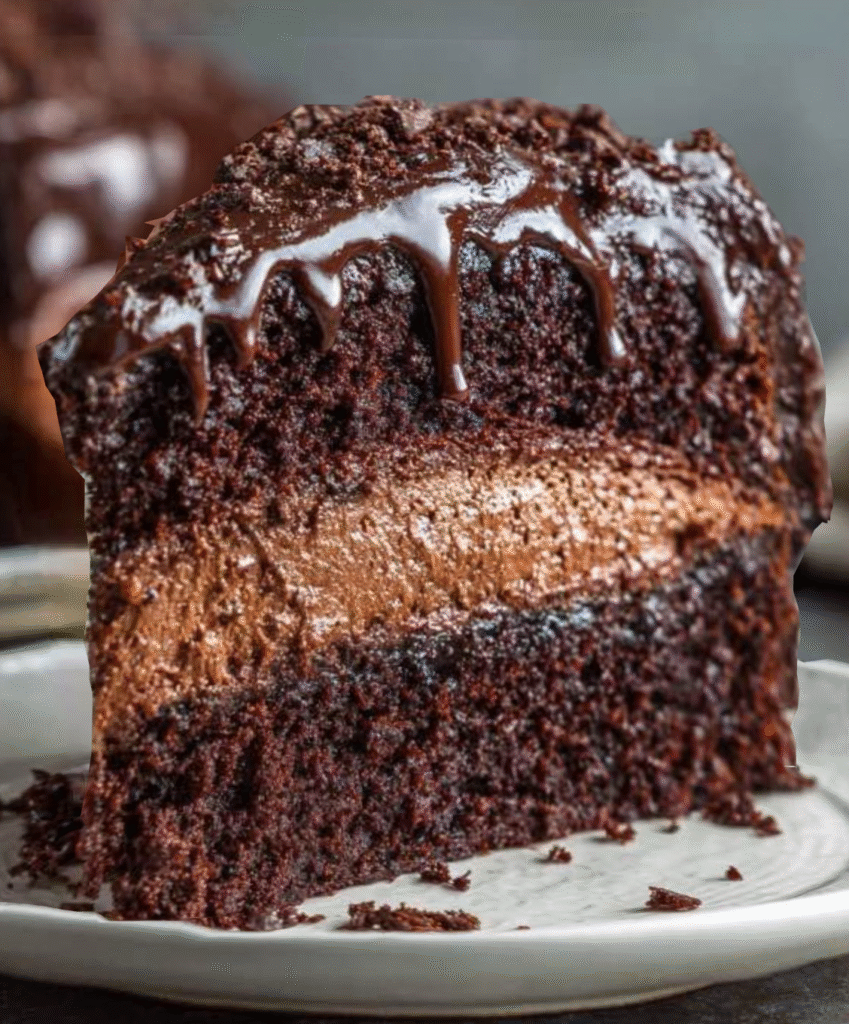
This decadent dessert is the ultimate showstopper for serious chocolate lovers, combining two classic favorites into one towering masterpiece. It features a rich, dense layer of baked chocolate cheesecake sandwiched between two moist, tender chocolate cake rounds, all enveloped in a silky dark chocolate ganache. The result is a trifecta of textures—fluffy, creamy, and smooth—delivering an intense cocoa experience in every slice.
Why You’ll Love This Recipe
- Three Desserts in One – You don’t have to choose between cake and cheesecake; this recipe delivers the best of both worlds with a bonus ganache finish.
- Incredible Texture Contrast – The crumb of the sponge cake perfectly complements the dense, velvety smoothness of the cheesecake layer.
- Professional Presentation – When sliced, the distinct layers create a stunning visual effect that looks like it came from a high-end bakery.
- Deep Flavor Profile – Using hot coffee in the batter and dark chocolate in the filling ensures a sophisticated, robust chocolate taste that isn’t overly sweet.
- Make-Ahead Friendly – Since the cheesecake layer needs to chill thoroughly, this cake is actually better when prepared over two days, reducing stress on the day of serving.
- Forgiving Decoration – The pour-over ganache naturally creates a smooth finish, hiding any imperfections or unevenness in the cake layers.
Ingredients You’ll Need
For the Chocolate Cake Layers
- All-Purpose Flour (2 cups) – Provides the structure for the cake layers.
- Cocoa Powder (¾ cup) – Use unsweetened Dutch-process cocoa for a darker color and fudgier taste.
- Granulated Sugar (1½ cups) – Sweetens the cake and helps retain moisture.
- Leavening Agents (1 tsp Baking Soda & 1½ tsp Baking Powder) – Essential for lifting the heavy batter.
- Eggs (2) & Milk (1 cup) – Provide richness and hydration.
- Vegetable Oil (½ cup) – Ensures the cake remains moist even after refrigeration (butter tends to harden).
- Hot Coffee or Water (1 cup) – The heat blooms the cocoa powder, releasing more flavor; coffee enhances chocolate notes without adding coffee flavor.
For the Chocolate Cheesecake Filling
- Cream Cheese (400g / 14oz) – Full-fat block style, strictly at room temperature to prevent lumps.
- Dark Chocolate (150g / 5oz) – Melted and slightly cooled; use 60–70% cocoa for the best depth.
- Sugar (¾ cup) – Balances the tang of the cheese.
- Eggs (2) – Binds the cheesecake and gives it structure.
- Heavy Cream (½ cup) – Adds luxurious creaminess to the batter.
For the Chocolate Ganache
- Heavy Cream (200ml) – Heated to melt the chocolate.
- Dark Chocolate (200g) – Chopped finely or chips; creates the glossy finish.
Step-by-Step Instructions
Step 1: Make the Cake Batter
Preheat your oven to 350°F (175°C). In a large mixing bowl, whisk together the flour, cocoa powder, sugar, salt, baking soda, and baking powder. Add the eggs, milk, oil, and vanilla extract, whisking until combined. Finally, slowly pour in the hot coffee (or water) while stirring gently; the batter will be very thin and runny, which is normal.
Step 2: Bake the Cake Layers
Grease two 8-inch (20cm) or 9-inch round cake pans and line the bottoms with parchment paper. Divide the batter evenly between the two pans. Bake for 30–35 minutes, or until a toothpick inserted into the center comes out clean. Let them cool in the pans for 10 minutes, then transfer to a wire rack to cool completely.
Step 3: Prepare the Cheesecake Batter
Reduce the oven temperature to 320°F (160°C). In a mixer, beat the room-temperature cream cheese and sugar until smooth and creamy. Add the eggs one at a time, mixing on low speed. Stir in the heavy cream, vanilla, and the melted (but not hot) dark chocolate until fully incorporated and uniform in color.
Step 4: Bake the Cheesecake Layer
Line an 8-inch (20cm) springform pan or cake pan with parchment paper (bottom and sides). Pour the cheesecake batter into the pan. Bake for 40–45 minutes until the edges are set but the center still has a slight wobble. Remove from the oven, let it cool to room temperature, then refrigerate for at least 2 hours (preferably overnight) until firm.
Step 5: Make the Ganache
Place the chopped dark chocolate in a heatproof bowl. Heat the heavy cream in a small saucepan until it just begins to simmer (do not let it boil over). Pour the hot cream over the chocolate and let it sit undisturbed for 2 minutes. Gently whisk from the center outward until the mixture is glossy and smooth.
Step 6: Assemble the Cake
Place one cooled cake layer on your serving platter. Carefully unmold the chilled cheesecake layer and place it on top of the cake base. Top with the second cake layer. Pour the warm ganache over the top, letting it drip down the sides. Garnish with chocolate shavings or chips if desired.
Recipe Notes & Tips
- Pan Size Consistency – Ensure your cake pans and the pan used for the cheesecake are the same diameter (e.g., all 8-inch). If they differ, the layers won’t stack flush.
- Room Temperature Ingredients – The cream cheese and eggs for the filling must be at room temperature. Cold ingredients will cause the melted chocolate to seize, resulting in a grainy cheesecake.
- Handling the Cheesecake – The cheesecake layer is essentially a “crustless” cheesecake. It is delicate. Freezing it for 30 minutes before assembly makes it much easier to peel off the parchment and stack without breaking.
- Leveling the Cakes – If your chocolate cakes bake with a dome on top, use a serrated knife to slice the tops flat before assembly. This prevents the cheesecake layer from sliding off or cracking.
- Cooling is Crucial – Do not attempt to assemble this cake while any part is warm. The cheesecake will melt, and the ganache will slide right off. Patience is key.
Nutritional Information
- Prep Time: 40 minutes
- Cooking Time: 1 hour 20 minutes (combined baking)
- Chilling Time: 4 hours minimum
- Total Time: 6+ hours
- Servings: 12–16 Slices
- Calories: Approximately 650–750 kcal per slice (Estimate)
Perfect Pairings
- Fresh Raspberries – The tartness of fresh berries cuts through the intense richness of the triple chocolate layers.
- Espresso or Cappuccino – Strong coffee balances the sweetness and enhances the cocoa notes.
- Vanilla Bean Whipped Cream – A dollop of unsweetened or lightly sweetened cream provides a light contrast to the dense cake.
- Salted Caramel Sauce – A drizzle of salted caramel adds a savory dimension that elevates the chocolate.
Ideal Occasions
- Milestone Birthdays – A “wow-factor” cake perfect for celebrating significant ages or events.
- Valentine’s Day – The ultimate romantic dessert for chocolate lovers.
- Holiday Dinner Parties – A sophisticated finale to a Christmas or Thanksgiving feast.
- Dinner Party Centerpiece – When you want to impress guests with your baking skills without needing advanced decorating techniques.
Storage & Serving Tips
- Keep Refrigerated – Because of the cheesecake layer and cream-based ganache, this cake must be stored in the refrigerator.
- Serve Chilled or Temper – You can serve it straight from the fridge for a firm texture, or let it sit out for 20 minutes to soften the ganache and cake crumb.
- Clean Slicing – To get perfect layers in every slice, dip a sharp knife in hot water and wipe it dry before each cut.
- Shelf Life – The cake will keep fresh in the fridge, covered, for up to 4–5 days.
Creative Variations to Try
- Mocha Version – Add a tablespoon of instant espresso powder to the ganache and the cheesecake batter for a coffee-forward kick.
- Black Forest Twist – Add a layer of cherry compote or kirsch-soaked cherries between the cheesecake and the top cake layer.
- White Chocolate Contrast – Make the middle cheesecake layer using white chocolate instead of dark for a striking color and flavor contrast (tuxedo cake style).
- Nutty Crunch – Sprinkle toasted hazelnuts or walnuts over the ganache before it sets for added texture.
Troubleshooting Common Issues
- Cheesecake Cracked – This usually happens from overbaking or cooling too fast. Don’t worry—it will be covered by the top cake layer and ganache, so no one will know!
- Ganache Too Runny – If the ganache is too thin to coat the cake, let it sit at room temperature for 10–15 minutes to thicken up before pouring.
- Layers Sliding – If the filling is sliding out, the cake or cheesecake wasn’t cold enough during assembly. Insert a skewer down the center to hold it in place and chill the whole cake for 30 minutes.
- Grainy Cheesecake – This is caused by adding hot melted chocolate to cold cream cheese. Ensure the chocolate is cooled to lukewarm and cheese is room temperature.
Why This Recipe Works
This recipe leverages the specific properties of different fats to create texture. The cake uses vegetable oil rather than butter; oil remains liquid at refrigerator temperatures, ensuring the cake layers stay soft and moist even though the cake must be kept cold for the cheesecake safety. The hot liquid in the cake batter blooms the cocoa powder, breaking down its starch and intensifying the chocolate flavor.
Structurally, the cheesecake layer is denser than a mousse but lighter than a fudge, acting as a sturdy pillar that supports the top cake layer without squishing out the sides. The ganache acts as an enrobing seal, locking moisture into the sponge cake and preventing it from drying out in the fridge.
Final Thoughts
The Chocolate Cheesecake Filled Cake is a labor of love that pays off with every bite. It is a “legendary” dessert because it satisfies every craving at once: the comfort of cake, the decadence of cheesecake, and the luxury of truffle-like ganache. While it requires some time management to bake and cool the components, the assembly is surprisingly simple, making you look like a pastry pro with minimal stress.