
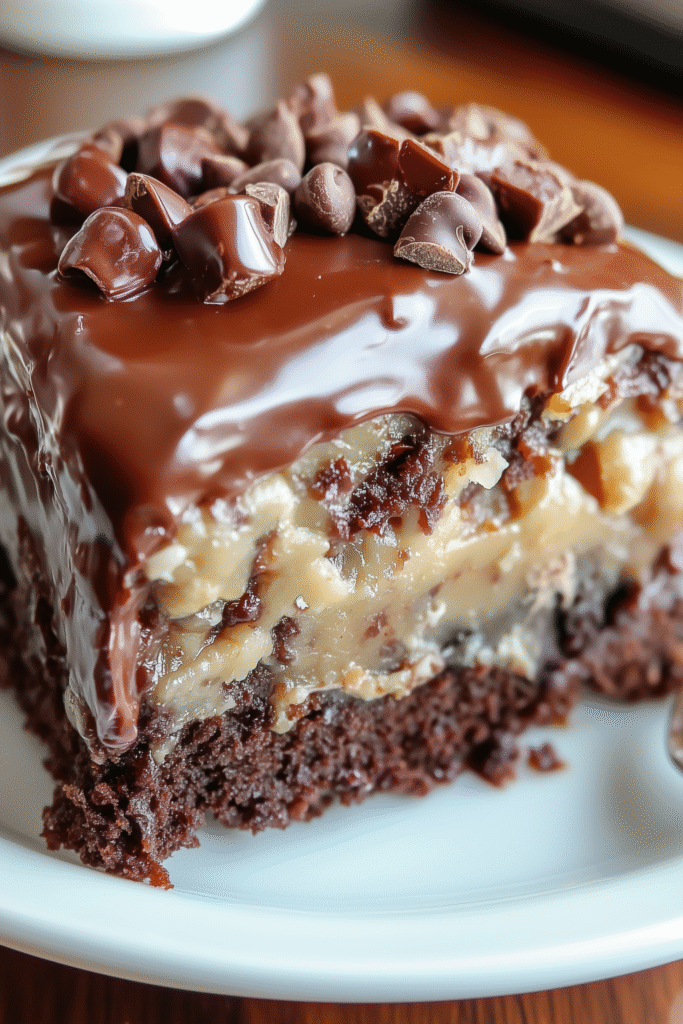
This Chocolate Turtle Cake is an indulgent, crowd-pleasing dessert featuring moist chocolate cake soaked with sweetened condensed milk and caramel, then topped with fluffy whipped cream, crunchy pecans, mini chocolate chips, and a drizzle of salted caramel. By using a convenient boxed cake mix as the base and poking holes throughout to allow the caramel mixture to soak in, this recipe creates a “poke cake” with incredible moisture and rich flavor reminiscent of chocolate turtle candies. The result is an easy yet impressive dessert perfect for potlucks, parties, holidays, or any time you want something decadent that feeds a crowd.
Why You’ll Love This Recipe
- Turtle Candy Inspiration – Captures all the beloved flavors of chocolate turtle candies—chocolate, caramel, and pecans—in easy-to-serve cake format.
- Ultra-Moist Texture – The poke cake technique with sweetened condensed milk and caramel creates incredibly moist, almost gooey texture throughout.
- Easy Starting Point – Uses boxed cake mix as the base, eliminating complicated from-scratch cake baking while still delivering impressive results.
- Make-Ahead Convenience – Must be refrigerated for hours anyway, making this ideal for preparing the day before parties or gatherings.
- Serves a Crowd – One 9×13 pan easily serves 12-15 people, making this economical and practical for large groups.
- Guaranteed Crowd-Pleaser – The combination of chocolate, caramel, pecans, and whipped cream appeals universally across ages and preferences.
Ingredients You’ll Need
For the Chocolate Cake Base:
- 1 box (15.25 ounces) Devil’s Food chocolate cake mix – Provides the rich chocolate foundation
- Ingredients required on cake mix box (typically eggs, oil, water) – Necessary for preparing the batter
For the Caramel Soak:
- 1 can (14 ounces) sweetened condensed milk – Adds sweetness and creates ultra-moist texture
- 1 jar (12 ounces) caramel sundae topping (ice cream topping) – Provides essential caramel flavor that soaks throughout
For the Topping:
- 1 container (8 ounces) whipped topping (Cool Whip or similar), thawed – Creates fluffy, creamy layer
- ½ cup chopped pecans – Adds essential nutty crunch characteristic of turtle candies
- ½ cup mini semi-sweet chocolate chips – Provides chocolate bursts and visual appeal
- ⅓ cup salted caramel sauce for drizzling – Final finishing touch that adds extra caramel intensity
Step-by-Step Instructions
Preheat and Prepare Pan Preheat your oven to 350°F (175°C). Line a 9×13-inch baking pan with aluminum foil, leaving overhang on two opposite sides to create handles for easy removal later. Lightly spray the foil with nonstick cooking spray to prevent sticking.
Prepare and Bake the Cake Prepare the Devil’s Food chocolate cake batter according to the package directions, typically mixing the cake mix with eggs, oil, and water as specified. Pour the batter into the prepared pan, spreading evenly. Place in the preheated oven and bake according to box directions, but begin checking for doneness about 3-5 minutes early—the cake is done when a toothpick inserted into the center comes out clean or with just a few moist crumbs. Don’t overbake or the cake will be dry.
Mix the Caramel Soak While the cake bakes, prepare the caramel mixture. In a medium bowl, whisk together the sweetened condensed milk and caramel sundae topping until smooth and well combined. The mixture should be pourable but thick. Set aside until the cake is ready.
Poke the Holes As soon as the cake comes out of the oven while it’s still hot, use the handle end of a wooden spoon to poke holes all across the surface of the cake. Make approximately 60 holes spaced about 1 inch apart, poking down about three-quarters of the way through the cake but not completely to the bottom. The holes should be evenly distributed across the entire surface.
Pour the Caramel Mixture Immediately while the cake is still hot, slowly pour the caramel-condensed milk mixture over the entire surface of the cake, making sure to cover all areas. The hot cake will absorb the mixture as you pour—take your time and ensure the liquid fills all the holes and spreads across the surface. Use a spatula to help spread if needed. Let the cake cool at room temperature for about 10 minutes to allow the caramel to soak in.
Add Whipped Topping Once the cake has cooled for 10 minutes but is still slightly warm, spread the thawed whipped topping evenly across the entire surface, creating a smooth layer that covers the caramel-soaked cake. Use an offset spatula or the back of a spoon to spread it edge to edge.
Add Toppings Sprinkle the chopped pecans evenly over the whipped cream layer. Then scatter the mini chocolate chips across the entire surface. The pecans and chips should create an even, attractive topping layer with good coverage.
Refrigerate Cover the pan tightly with plastic wrap or aluminum foil—be careful not to let it touch the whipped cream surface. Refrigerate for at least 2 hours, though overnight is ideal. This chilling time is essential—it allows the cake to fully absorb the caramel, the whipped cream to set, and all flavors to meld together.
Drizzle and Serve Just before serving, remove the plastic wrap and drizzle the salted caramel sauce over the entire top of the cake in decorative lines or patterns. Using a sharp knife dipped in hot water and wiped clean between cuts, slice the cake into 12 squares. Serve cold directly from the refrigerator. The cake can sit at room temperature during serving for up to 2 hours but should remain refrigerated otherwise.
Recipe Notes & Tips
- Devil’s Food vs. Chocolate – Devil’s Food cake mix is darker, richer, and more chocolatey than regular chocolate; use Devil’s Food specifically for best results.
- Fresh Pecans – Use fresh pecans for best flavor; stale nuts taste bitter and can ruin the cake. Toast them briefly if desired for deeper flavor.
- Don’t Skip Poking – The holes are essential; without them, the caramel mixture just sits on top rather than soaking throughout the cake.
- Hot Cake Critical – Pour the caramel mixture while the cake is hot; a cool cake won’t absorb the liquid properly.
- Complete Chilling – The minimum 2-hour chill time is essential; cutting into warm cake results in messy, falling-apart slices.
- Aluminum Foil Lining – Makes removal and serving much easier; lift the whole cake out using the foil handles if desired.
Nutritional Information
- Prep Time: 10 minutes (mixing batter, preparing caramel mixture)
- Cook Time: 25 minutes (baking time, varies by cake mix)
- Chill Time: 2+ hours (essential for proper setting)
- Total Time: 2 hours 35 minutes (including chilling)
- Servings: 12 squares
- Calories: Approximately 420-450 per serving (varies based on exact cake mix and slice size)
Perfect Pairings
- Serve with hot coffee, cappuccino, or espresso for classic cake-and-coffee combination that balances the sweetness.
- Pair with cold milk for those who prefer traditional cake accompaniment, especially popular with children.
- Complement with vanilla ice cream for à la mode presentation where cold ice cream contrasts with the rich cake.
- Include in dessert buffets alongside other options like brownies, cookies, or cheesecake for variety.
Ideal Occasions
- Perfect for potlucks, church suppers, or covered dish events where crowd-pleasing desserts that serve many are needed.
- Excellent choice for birthday celebrations, anniversaries, or special milestones when you want impressive dessert without extensive baking skills.
- Ideal for holidays like Thanksgiving, Christmas, or Easter when you need make-ahead desserts that free oven space on the big day.
- Great option for office parties, bake sales, or fundraisers when you want guaranteed sellers that appeal universally.
Storage & Serving Tips
- Store leftover cake covered in the refrigerator for up to 4 days; the cake actually improves on days 2-3 as flavors meld.
- Keep refrigerated at all times except during serving; the whipped topping and caramel require cold storage for food safety and quality.
- Don’t freeze this cake; the whipped topping doesn’t maintain quality when frozen and thawed, becoming watery and separated.
- Add the final caramel drizzle just before serving rather than in advance; this keeps it from soaking in too much and maintains visual appeal.
Creative Variations to Try
- German Chocolate Style – Use German chocolate cake mix and top with coconut-pecan frosting instead of whipped cream for different classic combination.
- Peanut Butter Addition – Swirl ½ cup melted peanut butter into the caramel mixture before pouring for turtle-meets-peanut butter cup variation.
- Dark Chocolate – Use dark chocolate cake mix and dark chocolate chips for more sophisticated, less sweet version.
- Extra Caramel – Add an additional layer of caramel topping between the whipped cream and nuts for extreme caramel lovers.
Troubleshooting Common Issues
- Cake dry not moist – Didn’t poke enough holes, poked while cake was cool, or overbaked the cake; poke thoroughly while hot and watch baking time.
- Caramel didn’t soak in – Cake cooled too much before pouring or holes weren’t deep enough; pour immediately on hot cake with deep holes.
- Whipped cream melting – Added to hot cake or stored at room temperature; let cake cool 10 minutes and keep refrigerated.
- Messy, falling apart – Didn’t chill long enough or cut while warm; ensure full 2+ hours chilling and cut cold.
Why This Recipe Works
This chocolate turtle cake succeeds by using the “poke cake” technique that creates incredibly moist texture while infusing flavor throughout, combined with the beloved flavor profile of chocolate turtle candies. The Devil’s Food cake mix provides deep, rich chocolate foundation—using a mix creates reliable results without complicated from-scratch baking. Lining with foil and checking doneness early prevents overbaking that would create dry cake. Poking approximately 60 holes while the cake is hot creates channels throughout—these holes allow the caramel mixture to penetrate deep into the cake rather than just sitting on top. The combination of sweetened condensed milk and caramel sundae topping creates the soaking liquid—the condensed milk adds sweetness and creates moisture while the caramel provides essential flavor. Pouring this immediately on the hot cake is crucial; the heat causes the cake to absorb the liquid like a sponge. Cooling for 10 minutes before adding whipped topping prevents it from melting but keeps the cake warm enough to have absorbed the caramel. The Cool Whip creates fluffy, stable topping that doesn’t require whipping cream and holds up beautifully in the refrigerator. The chopped pecans add essential crunch and nutty flavor that defines turtle candies. The mini chocolate chips provide chocolate bursts and visual appeal without being too large. The extended refrigeration (minimum 2 hours, ideally overnight) allows the caramel to finish soaking in, the cake to set properly for clean slicing, and all flavors to meld together. The final salted caramel drizzle added just before serving provides visual polish and extra caramel intensity. At approximately 420-450 calories per serving, this is an indulgent dessert with significant calories from cake, sweetened condensed milk, caramel, whipped topping, and toppings—it’s celebration food meant for special occasions when you want maximum satisfaction.
Final Thoughts
Chocolate Turtle Cake represents the kind of potluck-perfect, crowd-pleasing dessert that has made poke cakes enduringly popular in American home baking—they deliver impressive results without requiring advanced skills, they serve many people from a single pan, they improve with time making them ideal for advance preparation, and they combine beloved flavors in ways that create something greater than the sum of their parts. This particular version honoring chocolate turtle candies brings together the classic combination of chocolate, caramel, and pecans that has delighted candy lovers for generations, transforming those flavors into shareable cake format. The use of boxed cake mix as the foundation removes intimidation for novice bakers while still producing results that look and taste homemade and special. Whether you’re a busy parent seeking impressive desserts without extensive time investment, someone responsible for bringing sweets to gatherings, a chocolate-caramel-pecan enthusiast, or simply appreciate desserts that deliver maximum flavor with reasonable effort, this turtle cake proves that sometimes the most memorable recipes are the ones that combine smart shortcuts with proper technique to create food that makes people happy—it’s rich, it’s sweet, it’s indulgent, it’s easy, and it demonstrates that great desserts don’t always require starting from scratch but rather knowing how to elevate convenient products into something truly special that brings joy to everyone fortunate enough to get a slice.