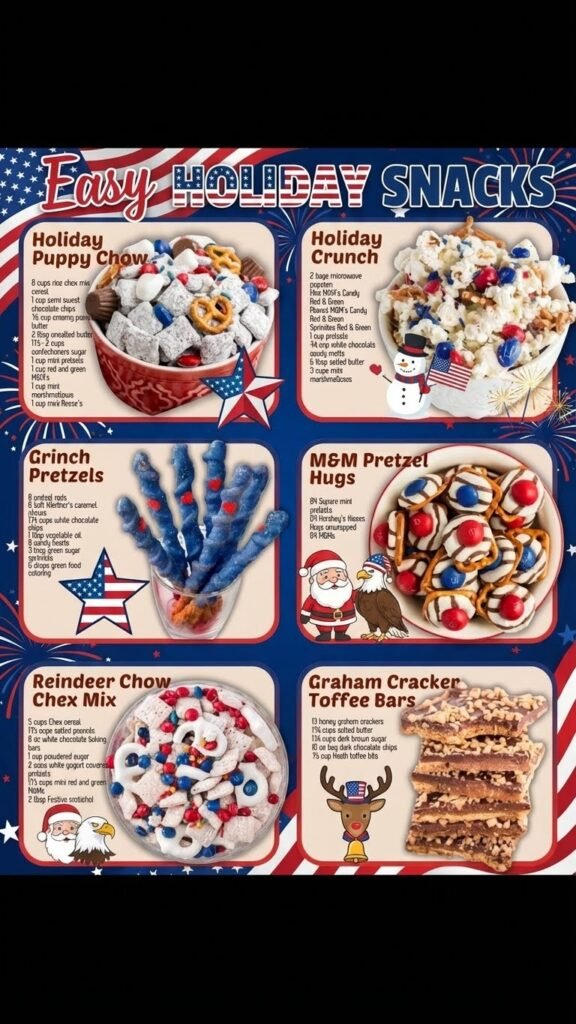
Holiday Puppy Chow combines crispy rice Chex cereal with a rich chocolate-peanut butter coating, then gets tossed in powdered sugar for that signature sweet crunch. Mixed with colorful candies, mini pretzels, marshmallows, and peanut butter cups, this festive snack delivers the perfect balance of sweet and salty in every handful.
Why You’ll Love This Recipe
Quick Assembly – This no-bake treat comes together in just 10 minutes, making it ideal for last-minute gatherings or spontaneous snack cravings without any oven time required.
Crowd-Pleasing Appeal – The combination of chocolate, peanut butter, and crunchy cereal coated in powdered sugar creates an irresistible texture that appeals to both kids and adults at any celebration.
Customizable Mix-Ins – You can easily adjust the candy additions based on preferences or dietary needs, swapping out chocolate candies for alternatives while maintaining the festive appearance.
Perfect for Gifting – This snack transfers beautifully into decorative bags or jars, making it an excellent homemade gift that stays fresh for several days when properly stored.
Minimal Ingredients – With just a handful of pantry staples and your choice of colorful candies, you can create a generous batch without hunting down specialty items.
No Special Equipment Needed – All you need is a microwave, mixing bowls, and basic measuring tools to create this party-ready snack that looks impressively festive.
Ingredients You’ll Need
Base Components:
8 cups rice Chex cereal – provides the crunchy foundation that holds the chocolate coating and creates the signature texture of puppy chow
1 cup semi-sweet chocolate chips – melts smoothly to create the rich chocolate layer that binds to the cereal and balances the sweetness
½ cup creamy peanut butter – adds nutty richness and helps the chocolate coating adhere evenly while providing a smooth, creamy texture
2 tablespoons unsalted butter – enhances the chocolate’s glossiness and helps create a fluid coating that spreads easily over the cereal
1½-2 cups confectioners sugar – creates the distinctive white coating that sweetens the mix and prevents the chocolate-covered pieces from sticking together
Festive Mix-Ins:
1 cup mini pretzels – introduces a salty crunch that contrasts beautifully with the sweet elements throughout the mix
1 cup blue and pink M&M’s – adds pops of festive color and candy-coated chocolate that complement the peanut butter base
1 cup mini marshmallows – provides soft, pillowy bites that balance the crunchier components with their airy texture
1 cup mini Reese’s peanut butter cups – delivers extra peanut butter-chocolate flavor in convenient bite-sized pieces
Optional: decorative sprinkles – adds visual appeal and celebratory flair to the finished snack mix
Step-by-Step Instructions
Prepare the Cereal Base
Place the rice Chex cereal in a large mixing bowl and set it aside while you prepare the chocolate coating. Using a bowl large enough to accommodate mixing will make the coating process much easier.
Create the Chocolate Coating
Combine the chocolate chips, peanut butter, and butter in a microwave-safe bowl, then microwave in 15-second intervals, stirring thoroughly between each heating until the mixture becomes completely smooth and glossy. This gradual heating prevents scorching and ensures even melting.
Coat the Cereal
Pour the melted chocolate mixture over the cereal and stir gently but thoroughly with a spatula until every piece is evenly coated with the chocolate-peanut butter mixture. Take your time to ensure complete coverage for the best texture.
Apply the Powdered Sugar
Transfer the chocolate-coated cereal to a large bowl with a lid or a gallon-sized storage bag, add the confectioners sugar, then seal and shake vigorously until all the chocolate coating is completely covered in white powder. You can also toss in an open bowl if you prefer.
Add the Festive Elements
Move the powdered mixture to a clean serving bowl and fold in the mini pretzels, colorful M&M’s, mini Reese’s cups, and marshmallows, stirring gently until all the add-ins are distributed evenly throughout the mix. Add sprinkles at this stage if desired for extra visual appeal.
Recipe Notes & Tips
Chocolate-to-Peanut Butter Ratio – Feel free to adjust the proportions of chocolate and peanut butter based on your preference for a richer chocolate flavor or more pronounced peanut butter taste.
Separate Mixing Method – Adding the candies and extras after the powdered sugar coating allows you to see the distinct colors and textures better than mixing everything together at once.
Sprinkle Selection – Larger decorative sprinkles work best for this recipe since smaller ones tend to settle at the bottom of the bowl rather than adhering to the coated pieces.
Pretzel Size Matters – Extra tiny pretzels integrate better with the Chex pieces and other mix-ins, creating a more uniform snack experience with every handful.
Peanut Butter Type – Processed peanut butter brands like Jif or Skippy set properly at room temperature, while all-natural varieties may remain too soft and cause clumping.
Setting Time – Spreading the powdered-sugar-coated cereal on a baking sheet for 15-30 minutes allows the chocolate to fully set and prevents pieces from sticking together in storage.
Nutritional Information
Prep Time: 10 minutes
Cooking Time: 2 minutes (microwave melting)
Total Time: 12 minutes
Servings: 10 cups (serving size based on approximately 1 cup portions)
Calories: Approximately 742 calories per serving (based on full recipe with all mix-ins included)
Perfect Pairings
Hot Chocolate Bar – Serve alongside mugs of hot cocoa with marshmallows and whipped cream for a cozy winter gathering where guests can enjoy sweet beverages with their snack mix.
Ice Cream Topping – Sprinkle this crunchy mix over vanilla or chocolate ice cream for an indulgent dessert that combines cold creaminess with the textured candy-coated cereal.
Party Mix Station – Display in decorative bowls alongside other snack mixes like spiced nuts, popcorn varieties, and cheese crackers for a self-serve snack table at celebrations.
Movie Night Spread – Pair with fresh popcorn, candy selections, and cold beverages for a festive film-watching experience that feels special without much preparation.
Ideal Occasions
Holiday Gatherings – This festive snack fits perfectly on dessert tables, buffet spreads, or appetizer stations at seasonal parties where guests can graze throughout the event.
Gift Giving – Package in clear cellophane bags tied with ribbons or in mason jars with decorative labels for thoughtful homemade presents that friends and neighbors will appreciate.
Kids’ Activities – Serve at school parties, scout meetings, or playdates where the colorful appearance and sweet-salty flavor appeal to young palates.
Casual Get-Togethers – Bring to game nights, book clubs, or informal gatherings where easy finger foods are appreciated and conversation flows around shareable snacks.
Storage & Serving Tips
Room Temperature Storage – Keep in an airtight container at room temperature for up to 4 days, though the snack tastes best within the first 2 days when the cereal maintains maximum crispness.
Refrigeration Option – While not necessary, you can refrigerate the mix if you prefer a chilled snack, which also slightly extends the freshness period by a day or two.
Avoid Freezing – The marshmallows and candy coatings don’t freeze well and can become sticky or lose their texture when thawed, so this treat is best enjoyed fresh.
Serving Suggestions – Present in decorative bowls, paper cones for individual servings, or small cups at parties where guests can easily grab a portion without utensils.
Creative Variations to Try
Nut-Free Version – Replace peanut butter with sunflower seed butter and swap mini Reese’s for additional M&M’s or candy-coated chocolates to accommodate allergies while maintaining flavor.
White Chocolate Base – Use white chocolate chips instead of semi-sweet for a sweeter, milder chocolate coating that pairs beautifully with colorful candy additions.
Seasonal Color Swaps – Change the M&M colors to pink and blue for winter celebrations, pastel shades for spring events, or orange and black for autumn gatherings.
Extra Crunch Addition – Mix in crushed freeze-dried strawberries, additional pretzel varieties, or toasted coconut flakes for more textural variety throughout the mix.
Troubleshooting Common Issues
Cereal pieces sticking together – Spread the chocolate-coated cereal on a baking sheet and let it cool for 15-30 minutes before adding powdered sugar to allow the coating to set properly.
Chocolate seizing or becoming grainy – Reduce microwave time to shorter intervals and stir more frequently, ensuring no water droplets contact the chocolate during melting.
Powdered sugar clumping – Make sure the chocolate coating has cooled slightly before tossing with powdered sugar, and shake the container vigorously to distribute the sugar evenly.
Mix-ins sinking to bottom – Fold in the candies and extras gently rather than stirring vigorously, and use similar-sized pieces so they distribute throughout rather than settling.
Why This Recipe Works
The success of this puppy chow lies in the careful balance between the crispy rice cereal’s structure and the smooth chocolate-peanut butter coating that clings to every piece. The butter helps thin the chocolate mixture just enough to create an even coating without making it too heavy, while the peanut butter adds body and prevents the chocolate from becoming brittle when it sets. Coating everything in powdered sugar serves a dual purpose—it adds sweetness while creating a barrier that prevents the chocolate pieces from sticking together during storage. The combination of temperatures during preparation is key: melting the chocolate mixture thoroughly ensures smooth coverage, while the room-temperature coating process allows the chocolate to set gradually, creating that signature crispy-chewy texture. The various mix-ins provide textural contrast, with soft marshmallows and crunchy pretzels creating interest in every bite. At approximately 742 calories per cup serving, this treat is quite indulgent, so portion sizes work well when served in smaller amounts at gatherings where variety is available.
Final Thoughts
Holiday Puppy Chow delivers festive appeal without requiring baking skills or extensive time in the kitchen, making it an accessible recipe for cooks of all experience levels. The visual impact of the colorful candies against the powdered sugar coating creates an attractive presentation that fits celebration tables beautifully, while the familiar flavors of chocolate and peanut butter ensure broad appeal across age groups. The recipe’s flexibility allows you to adjust candy selections, scale the batch size up or down, and accommodate dietary restrictions with simple substitutions. While this snack is certainly rich and sweet, you can create a lighter version by reducing the powdered sugar slightly and using dark chocolate chips for a less sweet chocolate coating. The joy of this recipe comes not just from eating it but from the simple process of making it—there’s something satisfying about transforming basic ingredients into a festive treat that brings smiles to everyone who tries it.
Holiday Crunch Popcorn
Holiday Crunch Popcorn transforms simple microwave popcorn into a festive sweet-and-salty snack with a white chocolate marshmallow coating studded with colorful candies and pretzel pieces. This quick recipe requires less than 15 minutes of active time and creates a party-ready treat that combines buttery popcorn with creamy sweetness and crunchy mix-ins.
Why You’ll Love This Recipe
Lightning-Fast Preparation – From start to finish, this recipe takes just 15 minutes of hands-on work, making it one of the quickest festive treats you can prepare for unexpected guests or last-minute celebrations.
Sweet and Salty Balance – The combination of buttered popcorn, sweet marshmallow coating, and salty pretzels creates a flavor profile that keeps you reaching for more without becoming overwhelming.
Minimal Ingredients Required – With just popcorn, butter, marshmallows, white chocolate, and your choice of candy mix-ins, you likely have most ingredients on hand already.
Visually Festive – The white coating dotted with colorful candies and sprinkles creates an attractive presentation that looks impressive despite the simple preparation method.
Easily Scalable – Whether you need a small batch for family snacking or a large quantity for gift-giving, this recipe scales up or down effortlessly without complicated adjustments.
Kid-Friendly Activity – Children can help with stirring, adding toppings, and decorating, making this an engaging kitchen project that creates edible results everyone enjoys.
Ingredients You’ll Need
Base Components:
2 bags microwave popcorn (about 10 cups popped) – provides the crunchy foundation with its airy texture that holds the sweet coating without becoming soggy
6 tablespoons salted butter – adds richness to the coating and helps melt the marshmallows and chocolate into a smooth, pourable consistency
3 cups mini marshmallows – creates the sweet, sticky base that binds the coating to the popcorn while adding subtle vanilla flavor
¾ cup white chocolate candy melts – contributes additional sweetness and a creamy chocolate element that complements the marshmallow’s flavor
Festive Mix-Ins:
Mini M&M’s candies in blue and pink – adds small pops of chocolate sweetness and celebratory color throughout the coated popcorn
Peanut M&M’s candies in blue and pink – provides larger candy pieces with a satisfying crunch from the peanut centers
1 cup pretzels, broken in half – introduces salty crunch that contrasts beautifully with the sweet coating and balances the overall flavor
Blue and pink sprinkles – adds visual appeal and festive decoration that makes the finished product look polished and party-ready
Step-by-Step Instructions
Prepare Your Workspace
Line an 11×17-inch baking sheet with parchment paper to create a non-stick surface for spreading the coated popcorn. This preparation makes cleanup easier and prevents the sticky coating from adhering to your pan.
Pop the Popcorn
Prepare both bags of microwave popcorn according to their package instructions, then spread the popped kernels over the prepared parchment-lined baking sheet in an even layer. Remove any unpopped kernels to prevent hard bits in your finished snack.
Create the Coating
In a medium saucepan over medium-low heat, melt the butter completely, then add the mini marshmallows and white chocolate candy melts, stirring continuously until the mixture becomes completely smooth with no lumps remaining. Keep the heat moderate to prevent scorching.
Apply Initial Coating
Pour approximately three-quarters of the warm butter-marshmallow-chocolate mixture over the spread popcorn, then use a silicone spatula to toss and coat the popcorn as evenly as possible. Work relatively quickly while the mixture stays fluid.
Add Toppings and Finish
Drizzle the remaining quarter of the coating mixture over the popcorn, then immediately sprinkle the mini M&M’s, peanut M&M’s, broken pretzels, and decorative sprinkles over the top while the coating is still tacky. Allow the pan to cool completely at room temperature before breaking into pieces.
Recipe Notes & Tips
Alternative Mixing Method – Instead of spreading on a sheet pan, you can toss the freshly popped popcorn in a very large bowl with three-quarters of the coating, add most of the mix-ins, then transfer to the pan and drizzle with remaining coating and toppings.
Coating Consistency – Stir the butter-marshmallow-chocolate mixture constantly over medium-low heat to prevent scorching, which can create a grainy texture rather than a smooth coating.
Timing Matters – Add all toppings while the coating is still warm and sticky so they adhere properly rather than falling off once everything has cooled and set.
Popcorn Quality – Use freshly popped popcorn for the best results, as stale popcorn won’t have the crispy texture that contrasts nicely with the creamy coating.
Even Distribution – Spread the popcorn in a single layer as much as possible before coating to ensure the mixture distributes evenly rather than pooling in certain spots.
Complete Cooling – Let the finished product cool completely before breaking apart or storing, as the coating needs time to set properly for the best texture.
Nutritional Information
Prep Time: 10 minutes
Cooking Time: 5 minutes (coating preparation)
Total Time: 15 minutes
Servings: 10 portions (approximately 1 cup each)
Calories: Approximately 177 calories per serving (based on equal division of the full batch)
Perfect Pairings
Hot Beverage Station – Serve alongside coffee, hot chocolate, or spiced cider at winter gatherings where the sweet popcorn complements warm drinks perfectly.
Dessert Table Addition – Display in decorative bowls or clear containers on dessert spreads where it adds color and textural variety among cookies and cakes.
Movie Night Feature – Pair with traditional buttered popcorn, candy selections, and soft drinks for a special film-watching experience that feels festive and indulgent.
Party Favor Packaging – Portion into clear cellophane bags tied with colorful ribbons as take-home treats that guests can enjoy after your celebration ends.
Ideal Occasions
Holiday Celebrations – This colorful popcorn fits perfectly at seasonal parties, open houses, or family gatherings where finger foods and snacks are the main offerings.
School Events – Bring to classroom parties, bake sales, or teacher appreciation days where the nut-free recipe (if you omit peanut M&M’s) accommodates common allergies.
Game Day Snacking – Serve at sports-watching parties or game nights where easy-to-eat finger foods keep guests satisfied without requiring plates or utensils.
Gift Giving – Package in mason jars, decorative tins, or festive boxes as homemade presents that show thoughtfulness without requiring significant time investment.
Storage & Serving Tips
Room Temperature Storage – Keep in an airtight container at room temperature for up to one week, storing away from direct sunlight or heat sources that could soften the coating.
Humidity Concerns – Avoid exposing the popcorn to moisture or humid environments, which can make it lose its crispy texture and become chewy or stale.
Complete Cooling Required – Always let the popcorn cool entirely before transferring to storage containers, as trapped warmth creates condensation that affects texture.
Serving Suggestions – Present in large bowls for group gatherings, or portion into individual paper cones or small bags for events where guests are standing and mingling.
Creative Variations to Try
Chocolate Drizzle Version – After the white coating sets, drizzle melted dark or milk chocolate over the popcorn in thin streams for added visual interest and chocolate flavor.
Seasonal Color Changes – Swap the candy colors to match different holidays or events—pastels for spring, orange and black for autumn, or school colors for team celebrations.
Nut Addition – Mix in cashews, almonds, or pecans along with the candies and pretzels for added protein and a more substantial crunch throughout.
Dark Chocolate Option – Replace white chocolate candy melts with dark chocolate for a less sweet, more sophisticated flavor profile that appeals to adult palates.
Troubleshooting Common Issues
Coating too thick and clumpy – Reduce heat when melting the marshmallow mixture and add the white chocolate gradually, stirring constantly to maintain a smooth, pourable consistency.
Mix-ins falling off – Apply toppings immediately after coating while the mixture is still tacky, and press them gently into the coating to help them adhere.
Popcorn becoming soggy – Make sure to use freshly popped popcorn and avoid over-coating; too much liquid mixture will weigh down the popcorn and eliminate its crispness.
Uneven coating distribution – Toss the popcorn gently but thoroughly after adding each portion of the coating mixture, ensuring every piece gets covered before the mixture begins to set.
Why This Recipe Works
The magic of this popcorn recipe lies in the science of how marshmallows and white chocolate melt together with butter to create a coating that’s fluid enough to coat popcorn evenly but sets up firm enough to maintain a pleasant texture without stickiness. Marshmallows provide structure through their gelatin content, which helps the coating adhere to the irregular surface of popcorn kernels, while the white chocolate adds smoothness and prevents the mixture from becoming too chewy. The butter serves as both a flavor enhancer and an emulsifier that helps all the components blend into a homogeneous coating. By spreading the popcorn in a single layer before coating, you maximize surface area and ensure even distribution, while the room-temperature cooling process allows the coating to set gradually rather than shock-cooling, which could make it brittle. The combination of sweet coating with salty popcorn and pretzels creates a balanced flavor that prevents palate fatigue, encouraging continued snacking. At approximately 177 calories per serving, this treat is more moderate than many holiday confections while still delivering satisfying sweetness.
Final Thoughts
Holiday Crunch Popcorn proves that impressive-looking festive treats don’t require complicated techniques or extensive ingredient lists. The recipe’s speed and simplicity make it particularly valuable during busy celebration seasons when you need something attractive and delicious without spending hours in the kitchen. Children enjoy both helping make this recipe and eating the results, creating opportunities for family time that produces tangible, shareable results. The white coating provides a neutral canvas for whatever color scheme or candy combination you prefer, making this recipe adaptable to virtually any celebration or personal taste. While the sweet coating makes this an indulgent snack, you can adjust the amount of coating mixture used to create a lighter version, or substitute sugar-free marshmallows and chocolate for a lower-sugar alternative. The versatility, visual appeal, and broad flavor appeal make this popcorn a reliable recipe to have in your entertaining repertoire for any occasion that calls for something special.
Winter Themed Pretzel Rods
Winter Themed Pretzel Rods feature crispy pretzel rods wrapped in soft caramel, then coated in white chocolate tinted blue and decorated with blue sugar sprinkles and pink candy hearts. This no-bake treat combines crunchy, chewy, sweet, and salty elements in a visually striking presentation perfect for themed celebrations.
Why You’ll Love This Recipe
No Baking Required – This recipe uses simple microwave melting and hand-wrapping techniques, making it accessible even if you’re uncomfortable with traditional baking methods.
Show-Stopping Appearance – The spiral caramel wrapped around each pretzel rod creates an eye-catching design that looks professionally made despite the simple construction process.
Textural Variety – Each bite delivers satisfying crunch from the pretzel, soft chewiness from the caramel, smooth sweetness from the chocolate coating, and sparkle from the sugar crystals.
Perfect Individual Portions – Pre-portioned pretzel rods make serving easy at parties and allow for beautiful presentation in jars, bags, or arranged on platters.
Customizable Colors – While this version uses a blue-and-pink color scheme, you can adapt the food coloring and decorations to match any theme or celebration.
Gift-Worthy Presentation – These elegant treats transfer beautifully to cellophane bags tied with ribbons, making them ideal for holiday gift-giving or party favors.
Ingredients You’ll Need
Structural Components:
8 pretzel rods – provides the crunchy, salty base that supports the caramel wrapping and creates the signature rod shape
8 soft Werther’s caramel chews, unwrapped – adds chewy sweetness and creates the decorative spiral pattern when wrapped around the pretzel
Coating and Decoration:
1½ cups white chocolate chips – melts into a smooth coating that covers the caramel and pretzel, providing a sweet chocolate layer
1 tablespoon vegetable oil – thins the white chocolate slightly for easier coating and creates a smoother, more glossy finish
6 drops green food coloring – tints the white chocolate to create the signature blue color (adjust to achieve desired shade)
3 tablespoons blue sugar sprinkles – adds sparkle, texture, and intensifies the blue color theme across the coated surface
8 candy hearts or large heart sprinkles – provides decorative pink accents that create visual contrast against the blue coating
Step-by-Step Instructions
Prepare the Caramel
Roll each soft caramel chew between your hands or on a clean countertop until it stretches to approximately 6 inches in length, creating a thin rope of caramel. Work in a room-temperature environment for easiest manipulation.
Wrap the Pretzels
Starting about an inch from the top of a pretzel rod, wrap the stretched caramel around the pretzel in a spiral pattern, working your way down to about 1 inch from the bottom, then press the caramel ends firmly into the pretzel to secure them in place. If your room is warm, place the wrapped pretzels on a non-stick surface immediately.
Melt the Chocolate
Combine the white chocolate chips and vegetable oil in a medium microwave-safe bowl, stirring to coat all chips with oil, then microwave in 15-second intervals, stirring thoroughly between each heating, until the chocolate melts completely smooth. Be careful not to overheat, as this causes the chocolate to seize and become grainy.
Tint the Coating
Add approximately 6 drops of green food coloring to the melted white chocolate and stir thoroughly until the color distributes evenly and you achieve your desired shade of blue. The exact amount varies by brand and desired intensity.
Coat the Pretzels
Using a spoon, carefully drizzle the tinted chocolate over each caramel-wrapped pretzel rod, starting about an inch from the base and working toward the tip, rotating the pretzel as needed to ensure complete coverage while allowing excess chocolate to drip back into the bowl. Work over the bowl to catch drips.
Add Decorations
Place each coated pretzel rod on parchment paper, then immediately sprinkle blue sugar generously over the wet chocolate and press one pink candy heart between the caramel swirls while the coating remains tacky. Work quickly before the chocolate begins to set.
Set the Coating
Transfer the decorated pretzel rods to the refrigerator for approximately 10 minutes, allowing the white chocolate to harden completely and the decorations to set firmly in place.
Recipe Notes & Tips
Chocolate Temperature Control – Microwave the white chocolate in short 15-second bursts and stir thoroughly between each interval to prevent overheating, which creates a thick, unworkable consistency.
Food Coloring Adjustment – Different brands of food coloring have varying intensities, so add drops gradually and check the color after each addition until you reach your preferred shade.
Room Temperature Considerations – If working in a warm kitchen, the caramel may become too soft and slide down the pretzel; in this case, briefly refrigerate the wrapped pretzels before coating.
Caramel Stretching Technique – Warm the caramel slightly between your hands before rolling to make it more pliable and easier to stretch to the proper length without breaking.
Coating Coverage – Focus the chocolate coating on the caramel-wrapped sections rather than trying to cover the entire pretzel rod, which helps maintain the visual spiral effect.
Decoration Timing – Apply sugar sprinkles and candy hearts immediately after coating each pretzel, as the chocolate sets quickly and decorations won’t adhere once it hardens.
Nutritional Information
Prep Time: 15 minutes
Chilling Time: 10 minutes
Total Time: 25 minutes
Servings: 8 pretzel rods
Calories: Approximately 244 calories per pretzel rod (includes all coating, caramel, and decorations)
Perfect Pairings
Hot Cocoa Bar – Serve these pretzel rods as stirrers in mugs of hot chocolate where they slowly release sweetness as they soften in the warm beverage.
Dessert Platters – Arrange on serving trays alongside cookies, fudge, and other confections where their vertical shape adds visual height and interest to the display.
Ice Cream Topping – Break the pretzel rods into pieces and use as a crunchy, sweet-salty topping for vanilla or chocolate ice cream sundaes.
Coffee Shop Style – Display in tall clear jars or vases on counters where guests can grab one to enjoy with their morning coffee or afternoon tea.
Ideal Occasions
Themed Parties – These visually distinctive treats fit perfectly at winter celebrations, blue-themed events, or any gathering where unique decorative foods enhance the atmosphere.
Kids’ Celebrations – Serve at children’s birthday parties, classroom events, or school celebrations where the playful appearance and familiar flavors appeal to young guests.
Holiday Gift Giving – Package individually in clear sleeves or arrange in decorative boxes as homemade gifts that look polished and thoughtful without requiring professional confection skills.
Bake Sales – Sell at school or community fundraisers where their eye-catching appearance and individual portions make them easy for customers to purchase and consume.
Storage & Serving Tips
Room Temperature Storage – Keep in an airtight container at room temperature for up to 24 hours, separating layers with parchment paper to prevent the chocolate coatings from touching and potentially sticking.
Refrigerated Storage – Store in the refrigerator in an airtight container for up to 3 weeks, which keeps the caramel from softening and maintains the chocolate coating’s integrity.
Avoid Freezing – The caramel and chocolate combination doesn’t freeze well, as temperature changes can cause the chocolate to develop bloom and the caramel to become too hard.
Serving Presentation – Display standing upright in decorative containers, arrange flat on serving platters, or package individually in cellophane bags for grab-and-go convenience.
Creative Variations to Try
Alternative Color Schemes – Change the food coloring and decoration colors to match different themes: orange and black for autumn, pink and blue for baby celebrations, or school colors for team events.
Chocolate Drizzle Addition – After the colored coating sets, drizzle contrasting dark or milk chocolate over the pretzels in thin streams for added visual interest and flavor complexity.
Nut Coating – Roll the freshly coated pretzels in finely chopped nuts like pistachios or almonds before adding sprinkles for extra crunch and sophisticated flavor.
Candy Variety – Replace the candy hearts with other small decorative elements like mini chocolate chips, colored pearls, or crushed peppermint candies depending on your theme.
Troubleshooting Common Issues
Caramel won’t stick to pretzel – Warm the caramel more thoroughly between your hands before wrapping, and press the ends firmly into the pretzel grooves to secure them.
Chocolate coating too thick – Add more vegetable oil one teaspoon at a time, stirring thoroughly, until the chocolate reaches a thinner, more pourable consistency.
White chocolate seizing and becoming grainy – This happens from overheating; start over with fresh chocolate and use shorter microwave intervals with thorough stirring between each heating.
Decorations falling off after setting – Apply sprinkles and candies immediately after coating while the chocolate is wet and tacky, pressing them gently to help them adhere.
Why This Recipe Works
The success of these pretzel rods depends on the careful balance between the structural integrity of the pretzel, the pliability of the caramel, and the fluid coating properties of properly melted white chocolate. Soft caramels like Werther’s contain the right moisture content to stretch without breaking while maintaining enough stickiness to adhere to the pretzel’s ridged surface. The vegetable oil added to the white chocolate serves as a tempering agent that lowers the viscosity without affecting the setting properties, creating a coating thin enough to cover smoothly but thick enough to hold decorations. The blue food coloring doesn’t affect the chocolate’s texture because gel or liquid colorings designed for chocolate won’t cause seizing the way water-based colors would. Refrigerating the finished rods accelerates the crystallization process in the chocolate, creating a firm snap when you bite through the coating while preventing the decorations from sliding. The temperature contrast between the cold chocolate coating and room-temperature serving creates a pleasant textural experience where the coating provides initial resistance before giving way to the soft caramel and crunchy pretzel. At 244 calories per rod, these treats offer reasonable portions for a special occasion indulgence.
Final Thoughts
Winter Themed Pretzel Rods demonstrate how simple techniques and readily available ingredients can produce impressive results that look far more complicated than they actually are to make. The hands-on nature of wrapping caramel and decorating each pretzel individually makes this an engaging project for families or groups, where everyone can customize their own rods with personal decoration choices. The recipe’s flexibility allows you to adapt colors and decorations to virtually any theme or occasion while maintaining the core concept of sweet-salty contrast and textural variety. While these treats are certainly indulgent, the pretzel base provides some substance beyond pure confection, and the individual portions encourage mindful enjoyment rather than mindless snacking. The visual impact of the colored coating and spiral design makes these pretzel rods particularly effective as edible decorations that enhance your party table before being enjoyed as treats.
Pretzel Hugs
Pretzel Hugs combine square mini pretzels with Hershey’s Hugs chocolates and colorful M&M’s in a simple three-ingredient treat that requires just minutes of preparation. These sweet-and-salty bites feature melted chocolate sandwiched between crunchy pretzel and candy-coated chocolate, creating an irresistible combination that’s perfect for cookie trays and gift boxes.
Why You’ll Love This Recipe
Minimal Ingredients – With just three components—pretzels, Hershey’s Hugs, and M&M’s—this recipe eliminates complicated shopping lists and keeps your pantry requirements simple.
Kid-Friendly Assembly – Children can help unwrap chocolates, arrange pretzels, and press M&M’s on top, making this an engaging family activity that produces edible results everyone enjoys.
Scalable Batch Size – The recipe scales perfectly whether you need just a few dozen for family snacking or several hundred for large gatherings, with proportions staying consistent.
Fast Preparation – From start to finish, including a brief baking time, these treats take less than 20 minutes of active work, making them ideal for last-minute entertaining needs.
Foolproof Technique – The low oven temperature gently softens the chocolate without melting it completely, creating a nearly fail-proof process that works consistently.
Beautiful Presentation – The colorful M&M’s atop white-striped Hugs chocolates on pretzel bases create an attractive appearance that looks polished on any serving platter.
Ingredients You’ll Need
Base Components:
84 square mini pretzels – provides the salty, crunchy foundation that supports the chocolate and creates the signature sweet-salty flavor combination
84 Hershey’s Hugs, unwrapped – delivers the white chocolate and milk chocolate striped center that softens in the oven to create a creamy layer
84 M&M’s in blue and pink – adds the colorful candy-coated chocolate topping that presses into the softened Hug and creates visual appeal
Step-by-Step Instructions
Preheat and Prepare
Preheat your oven to 200°F and line a large baking sheet with a silicone baking mat or parchment paper to create a non-stick surface. This low temperature is crucial for softening without completely melting the chocolate.
Unwrap the Chocolates
Remove all the foil wrappers from the Hershey’s Hugs and set the unwrapped chocolates aside in a bowl, preparing them for quick assembly once the pretzels are arranged. This advance preparation streamlines the process.
Arrange the Pretzels
Place the square mini pretzels on the prepared baking sheet in rows, fitting as many as possible while ensuring they don’t touch or overlap. They don’t need to be perfectly aligned, but organized rows make topping easier.
Add the Chocolates
Center one unwrapped Hershey’s Hug on each pretzel, positioning it so the chocolate sits flat and stable on the pretzel’s surface. Work systematically across the rows for efficient assembly.
Soften in Oven
Transfer the baking sheet to the preheated oven and bake for 5-6 minutes, watching carefully until the chocolates become soft and shiny but haven’t melted completely flat. The Hugs should hold their shape while becoming pliable.
Top with M&M’s
Remove the baking sheet from the oven and immediately press one M&M gently onto the center of each softened Hershey’s Hug, creating a slight indentation that will hold as the chocolate cools and sets.
Cool Completely
Allow the pretzel hugs to cool at room temperature until the chocolate hardens completely, or transfer the baking sheet to the refrigerator or freezer for 10-15 minutes if you need them to set quickly for serving or packaging.
Recipe Notes & Tips
Equal Proportions – Use equal numbers of pretzels, Hugs, and M&M’s for straightforward preparation; scale the recipe up or down by adjusting all three ingredients proportionally.
Unwrapping Reminder – Complete all chocolate unwrapping before you start assembling to prevent rushed work once the pretzels are arranged and ready for topping.
Baking Mat Benefits – Silicone baking mats provide the easiest release for these treats, though parchment paper works well; avoid using bare baking sheets as the chocolate will stick.
Temperature Precision – Don’t exceed 200°F or bake longer than 6 minutes, as the chocolates will melt too much and lose their distinctive shape and striped pattern.
Multiple M&M’s Option – Feel free to press 2-3 M&M’s onto each Hug for a more colorful, playful appearance, though single M&M’s create a cleaner, more uniform look.
Complete Cooling Required – Always let the chocolate set fully before handling or storing, as warm chocolate will smear and create messy results that lose their visual appeal.
Batch Planning – These treats disappear quickly at gatherings, so consider making extra batches since they store well and the process goes faster once you’ve completed one round.
Nutritional Information
Prep Time: 10 minutes
Cook Time: 8 minutes (5-6 minutes baking, 2-3 minutes assembly)
Total Time: 18 minutes
Servings: 84 pieces (adjust all ingredients proportionally for smaller or larger batches)
Calories: Approximately 31 calories per piece (making them reasonable for enjoying several pieces)
Perfect Pairings
Cookie Tray Variety – Arrange alongside traditional cookies, fudge, and other confections on dessert platters where their small size and colorful appearance add visual interest and textural contrast.
Coffee Station – Display in bowls near coffee makers at morning gatherings or afternoon meetings where guests can enjoy a small sweet with their beverages.
Party Favor Packaging – Fill small cellophane bags with 6-8 pieces tied with ribbons as take-home treats that guests appreciate for their homemade charm.
Movie Night Snacks – Serve in bowls alongside popcorn and other finger foods where the sweet-salty combination satisfies different craving types.
Ideal Occasions
Holiday Celebrations – These festive treats fit beautifully on seasonal dessert tables, cookie exchanges, or open houses where their colorful appearance matches celebratory themes.
Bake Sales – Package in clear bags or small boxes for school or community fundraisers where their attractive appearance and affordable price point appeal to customers.
Office Gatherings – Bring to workplace potlucks, meetings, or break room celebrations where individually portioned treats are easy to grab and enjoy without utensils.
Kids’ Events – Serve at birthday parties, classroom celebrations, or scout meetings where the familiar candy and chocolate flavors appeal to young palates.
Storage & Serving Tips
Make-Ahead Timeline – Prepare these several days before your event and store in covered containers, as they maintain quality well when properly stored away from heat.
Refrigerated Storage – Keep in an airtight container in the refrigerator for 1-2 weeks, separating layers with parchment paper to prevent the pieces from sticking together.
Room Temperature Serving – Remove from refrigeration about 15-20 minutes before serving to allow the chocolate to soften slightly, as very cold chocolate can be hard to bite through.
Avoid Freezing – The pretzels may soften and lose their crunch when thawed from frozen, so refrigeration is the better long-term storage option.
Creative Variations to Try
Dark Chocolate Version – Substitute Hershey’s Kisses for Hugs to create a darker chocolate flavor profile that appeals to those who prefer less sweet confections.
Peanut Butter Center – Use Reese’s Peanut Butter Cups miniatures instead of Hugs for a peanut butter-chocolate combination with extra richness.
Seasonal Color Changes – Switch M&M colors to match different occasions: pastels for spring, orange and black for autumn, or single colors for team spirit events.
Candy Variety – Top with Rolo candies, caramel-filled chocolates, or other small round candies that provide different flavor profiles while maintaining the basic concept.
Troubleshooting Common Issues
Chocolates melting completely flat – Reduce baking time by 1-2 minutes or lower oven temperature to 175°F; the chocolate should soften but maintain its shape rather than spreading.
M&M’s not adhering – Press the candies into the chocolate immediately after removing from the oven while the Hugs are still very soft and pliable.
Pretzels breaking when removing from pan – Ensure complete cooling before handling, and use a thin spatula to gently lift pieces from the baking surface if they stick slightly.
Uneven softening – Rotate the baking sheet halfway through baking time to ensure even heat distribution, especially if your oven has hot spots.
Why This Recipe Works
The genius of Pretzel Hugs lies in the precise temperature control that softens Hershey’s Hugs just enough to become pliable without losing their structure entirely. At 200°F, the oven provides gentle, even heat that warms the chocolate throughout while the short baking time prevents complete melting. The square pretzel shape provides a stable base that supports the cylindrical Hug without tipping, while the pretzel’s salt content creates a flavor contrast that prevents the sweetness from becoming overwhelming. Hershey’s Hugs specifically work better than solid chocolates because their white chocolate and milk chocolate combination has a slightly lower melting point than pure milk chocolate, making them more responsive to gentle heat. Pressing the M&M into the softened chocolate creates a mechanical bond as the chocolate cools and contracts around the candy’s base, holding it firmly in place. The candy shell on M&M’s protects the interior chocolate from melting during the brief time it contacts the warm Hug, maintaining the candy’s shape and appearance. At just 31 calories per piece, these treats offer guilt-free indulgence where eating 3-4 pieces still represents a moderate dessert portion.
Final Thoughts
Pretzel Hugs exemplify how simple ingredients and straightforward techniques can produce results that look impressive and taste delicious without requiring advanced cooking skills or specialized equipment. The recipe’s accessibility makes it perfect for involving children in kitchen activities where they can contribute meaningfully to the process and feel proud of the results. The sweet-and-salty combination has proven timeless appeal that spans generations, making these treats as popular with grandparents as with young children. While certainly a confection rather than health food, the small portion size and presence of pretzels provides slightly more substance than pure candy, and the visual appeal makes them satisfying as much for their appearance as their taste. The make-ahead capability and excellent storage properties make Pretzel Hugs particularly valuable during busy celebration seasons when you need reliable recipes that can be prepared in advance without sacrificing quality.
Holiday Muddy Buddies
Holiday Muddy Buddies transform Chex cereal and salted peanuts into a festive snack coated in white chocolate and powdered sugar, then mixed with yogurt-covered pretzels, colorful M&M’s, and decorative sprinkles. This variation on traditional puppy chow offers a lighter white chocolate base that showcases the colorful mix-ins beautifully.
Why You’ll Love This Recipe
Lightning-Fast Assembly – This recipe comes together in just 12 minutes from start to finish, making it one of the quickest festive snacks you can prepare for entertaining.
White Chocolate Base – The white chocolate coating creates a milder, sweeter flavor profile than traditional milk chocolate versions while providing a neutral backdrop that highlights the colorful additions.
Protein Addition – Salted peanuts throughout the mix add protein and substance beyond pure carbohydrates, creating a more satisfying snack with better nutritional balance.
Visually Stunning – The white powdered sugar coating dotted with blue and pink candies, white pretzels, and colorful sprinkles creates an eye-catching presentation that looks festive and polished.
Versatile Serving – This snack works equally well for casual family snacking, formal party presentations, or packaged as homemade gifts in decorative containers.
Freezer-Friendly – Unlike many treats, this muddy buddies variation freezes successfully for up to a month, allowing advance preparation during busy seasons.
Ingredients You’ll Need
Base Components:
5 cups Chex cereal – provides the crunchy, airy foundation that absorbs the white chocolate coating while maintaining crispy texture after the powdered sugar application
1½ cups salted peanuts – adds protein, healthy fats, and savory flavor that balances the sweetness throughout the mix
8 ounces white chocolate baking bars (two 4-ounce bars) – melts smoothly to create the coating that binds the powdered sugar to the cereal and nuts
1 cup powdered sugar – creates the signature sweet coating that covers the chocolate layer and prevents pieces from sticking together
Festive Mix-Ins:
2 cups white yogurt-covered pretzels, roughly chopped – contributes additional sweetness, creamy yogurt flavor, and crunchy texture that complements the cereal base
1½ cups mini M&M’s in blue and pink – provides pops of candy-coated chocolate and celebratory color throughout the white-coated mix
2 tablespoons festive sprinkles – adds visual sparkle and decorative appeal that makes the finished product look polished and party-ready
Step-by-Step Instructions
Combine Dry Ingredients
Mix the Chex cereal and salted peanuts together in a large bowl, creating the base mixture that will receive the chocolate coating. Use a bowl large enough to allow stirring without spilling.
Melt the Chocolate
Break the white chocolate baking bars into smaller pieces in a microwave-safe bowl, then microwave in 20-second intervals, stirring thoroughly between each heating until the chocolate melts completely smooth. Watch carefully to avoid overheating.
Coat the Base
Pour the melted white chocolate over the cereal-peanut mixture and stir with a spatula until every piece is thoroughly coated in chocolate, ensuring even coverage for the best final texture.
Apply Powdered Sugar
Liberally sprinkle the powdered sugar over the chocolate-coated mixture, then stir continuously until the cereal and nuts are completely covered in white powder, adding more sugar if needed. Alternatively, transfer to a gallon-sized bag and shake vigorously for more even distribution.
Transfer and Cool
Move the powdered mixture to a large serving bowl, leaving behind any excess powdered sugar in the mixing bowl rather than transferring it all to the final presentation.
Add Mix-Ins
Fold the chopped white yogurt-covered pretzels and blue and pink mini M&M’s into the powdered mixture, stirring gently until the colorful additions distribute evenly throughout the bowl.
Final Decoration
Sprinkle the festive sprinkles over the top of the bowl as a finishing touch that adds visual appeal and signals the snack is ready to serve.
Recipe Notes & Tips
Chocolate Melting Technique – Use 20-second microwave intervals rather than longer periods to prevent scorching, which causes white chocolate to seize and become grainy and unusable.
Powdered Sugar Distribution – A gallon-sized plastic bag makes coating easier and more thorough than bowl-stirring, as shaking distributes the sugar more evenly with less effort.
Pretzel Preparation – Roughly chopping the yogurt-covered pretzels creates varied sizes that integrate better than whole pretzels, which can dominate the mix visually and texturally.
Excess Sugar Removal – Leaving extra powdered sugar behind prevents the final product from having a chalky coating that detracts from the chocolate flavor underneath.
Color Balance – Distribute M&M’s evenly throughout rather than concentrating them in one area so every serving includes colorful candy pieces.
Setting Time – While not required, allowing the mixture to sit for 10-15 minutes before serving helps the powdered sugar coating set fully and prevents it from rubbing off on hands.
Nutritional Information
Prep Time: 10 minutes
Cook Time: 2 minutes (chocolate melting time)
Total Time: 12 minutes
Servings: 10 cups (approximately 1 cup per serving)
Calories: Approximately 610 calories per cup serving (includes all mix-ins and coating ingredients)
Perfect Pairings
Beverage Station – Serve alongside hot chocolate, coffee, or cold milk at gatherings where guests appreciate having a sweet snack with their drinks.
Dessert Table Addition – Display in decorative bowls or apothecary jars on dessert spreads where it adds textural variety among cakes, cookies, and other confections.
Movie Marathon – Pair with fresh popcorn, candy selections, and soft drinks for film-watching events where variety keeps snacking interesting throughout long viewing sessions.
Gift Packaging – Portion into clear cellophane bags, mason jars, or decorative tins as homemade presents that look impressive without requiring advanced cooking skills.
Ideal Occasions
Holiday Gatherings – This festive mix fits perfectly on celebration tables, cookie exchanges, or open houses where the colorful appearance matches seasonal themes.
Kids’ Activities – Serve at school parties, playdates, or family game nights where the sweet flavor and colorful appearance appeal to children while the peanuts add substance.
Office Celebrations – Bring to workplace potlucks or break room parties where the easy grab-and-go format allows colleagues to snack without interrupting their activities.
Casual Entertaining – Present at informal gatherings, sports-watching parties, or book clubs where relaxed finger foods complement the atmosphere better than plated desserts.
Storage & Serving Tips
Room Temperature Storage – Keep in an airtight container at room temperature for 3-4 days, checking daily for signs of staleness as the cereal gradually loses crispness.
Refrigerated Storage – Extend freshness by storing in the refrigerator in an airtight container, which maintains crunchiness for up to one week while keeping the chocolate coating firm.
Freezer Storage – Transfer to a freezer-safe plastic bag and freeze for up to one month, then thaw at room temperature for 15-20 minutes before serving.
Serving Suggestions – Present in large bowls for group gatherings, portion into small cups for standing events, or display in clear containers that showcase the colorful contents.
Creative Variations to Try
Almond Substitution – Replace peanuts with whole or sliced almonds for a more sophisticated flavor profile and to accommodate those who prefer different nuts.
Dark Chocolate Version – Use dark chocolate instead of white chocolate for a less sweet, more complex flavor that appeals to adult palates.
Seasonal Mix-Ins – Change candy colors and types to match different occasions: orange and black for autumn, pastels for spring, or single colors for themed events.
Additional Crunch – Mix in toasted coconut flakes, crushed freeze-dried berries, or broken graham crackers for more textural variety throughout.
Troubleshooting Common Issues
White chocolate seizing – This happens from overheating or water contact; start fresh with new chocolate and use shorter microwave intervals with thorough stirring between each heating.
Coating too thick or clumpy – Add the chocolate to the cereal mixture gradually rather than all at once, stirring between additions to ensure even distribution without overloading.
Powdered sugar not adhering – Coat the cereal mixture while the chocolate is still slightly warm so the sugar sticks better, creating a more even coating.
Mix becoming stale quickly – Store in completely airtight containers away from humidity, and avoid leaving the snack uncovered for extended periods during parties.
Why This Recipe Works
The success of Holiday Muddy Buddies depends on the precise interaction between the white chocolate coating and the powdered sugar layer that creates the signature texture. White chocolate melts at a lower temperature than dark or milk chocolate, making it easier to work with and less prone to seizing during the melting process. The Chex cereal’s structure provides numerous nooks and crevices that hold the chocolate coating, while its lightness prevents the mix from becoming too heavy or rich. Salted peanuts contribute fat and protein that create a more balanced nutritional profile and add savory notes that prevent palate fatigue from pure sweetness. The powdered sugar coating serves multiple purposes: it adds sweetness, creates a barrier that prevents the chocolate pieces from sticking together, and provides a neutral white backdrop that makes the colorful mix-ins stand out visually. Yogurt-covered pretzels bring additional sweetness and a creamy flavor dimension that complements rather than competes with the white chocolate base. The combination of different textures—crunchy cereal, crisp pretzels, smooth chocolate, and firm candies—creates sensory interest that keeps this snack engaging. At 610 calories per cup, this is certainly an indulgent treat, though the presence of nuts and cereal provides more substance than pure candy.
Final Thoughts
Holiday Muddy Buddies represents the perfect intersection of simplicity, visual appeal, and crowd-pleasing flavor that makes it invaluable during entertaining seasons. The white chocolate base creates a more neutral canvas than traditional chocolate versions, allowing the colorful mix-ins to shine while providing a slightly different flavor profile that offers variety for those who’ve tried many muddy buddy variations. The recipe’s speed makes it particularly practical when you need festive treats quickly, while the excellent storage properties allow advance preparation that reduces last-minute stress. Children enjoy both making and eating this snack, creating opportunities for family kitchen time that produces shareable results. While certainly a sweet indulgence, the peanuts add protein and the cereal provides whole grains, making this snack slightly more substantial than pure confections. The versatility of the color scheme and mix-ins means you can adapt this recipe to virtually any celebration theme while maintaining the core concept that makes muddy buddies so appealing—the irresistible combination of crunchy, sweet, chocolatey goodness that disappears quickly from any serving bowl.
Graham Cracker Toffee
Graham Cracker Toffee Bars layer honey graham crackers with buttery brown sugar toffee, then top with melted dark chocolate and crunchy Heath toffee bits for an elegant candy that requires no candy thermometer. This quick method produces crispy, buttery, intensely flavored bars that rival professional confections despite the simple five-ingredient formula.
Why You’ll Love This Recipe
No Candy Thermometer Required – This foolproof method uses visual and timing cues rather than precise temperature measurements, making candy-making accessible without specialized equipment.
Restaurant-Quality Results – The combination of buttery toffee, crisp graham base, and chocolate topping creates sophisticated flavor and texture that tastes professionally made.
Minimal Ingredients – With just five components—graham crackers, butter, brown sugar, chocolate chips, and toffee bits—this recipe keeps shopping simple while delivering impressive results.
Quick Preparation – From start to finished candy takes just 20 minutes of active work, though cooling time extends the total timeline before you can cut and serve.
Perfect Texture Contrast – Each bite delivers satisfying crunch from the graham crackers, smooth richness from the toffee layer, creamy chocolate coating, and crystalline bits from the Heath topping.
Gift-Worthy Elegance – These bars present beautifully in gift boxes or on serving platters, looking far more complex than the simple preparation would suggest.
Ingredients You’ll Need
Base Layer:
13 honey graham crackers (approximately 1½ sleeves) – creates the crispy foundation that supports the toffee and provides structure for clean cutting and serving
Toffee Layer:
1¼ cups (2½ sticks) salted butter – provides the rich, buttery base that combines with brown sugar to create authentic toffee flavor and texture
1¼ cups dark brown sugar, packed – adds deep molasses notes and caramelizes during cooking to create the characteristic toffee taste and color
Topping Layers:
10-ounce bag dark chocolate chips – melts into a smooth coating that adds bittersweet chocolate flavor balancing the sweet toffee underneath
½ cup Heath toffee bits – contributes additional toffee flavor and a satisfying crunchy texture that enhances both appearance and eating experience
Step-by-Step Instructions
Prepare the Pan
Preheat your oven to 350°F and line a 10×15-inch jelly roll pan with parchment paper, ensuring the paper extends slightly up the sides for easy removal later. This preparation prevents sticking and makes cutting simple.
Arrange Graham Crackers
Lay the honey graham cracker sheets in a single layer across the bottom of the prepared pan, fitting them as closely as possible. Breaking crackers to fill gaps is acceptable, as the toffee will seal everything together during baking.
Make the Toffee Mixture
Combine the salted butter and packed dark brown sugar in a medium saucepan over medium-high heat, stirring constantly until the butter melts completely and integrates with the sugar into a homogeneous mixture.
Cook to Proper Consistency
Bring the butter-sugar mixture to a full boil, then reduce the heat to maintain a steady simmer, stirring continuously for 5-7 minutes until the mixture thickens noticeably and lightens slightly in color from deep brown to a lighter caramel shade.
Apply Toffee Layer
Pour the hot toffee mixture evenly over the graham cracker layer, using a spatula to spread it if necessary to ensure complete coverage from edge to edge. Work quickly as the toffee begins setting as it cools.
Bake Until Bubbly
Transfer the pan to the preheated oven and bake for 5-7 minutes, watching carefully until the toffee mixture bubbles evenly across the entire surface, indicating it has reached the proper consistency.
Add Chocolate Layer
Remove the pan from the oven and immediately sprinkle the dark chocolate chips evenly over the hot toffee surface, then let them sit undisturbed for 5 minutes until the residual heat softens them enough to spread.
Spread and Top
Use an offset spatula or the back of a spoon to spread the softened chocolate into an even layer covering the entire toffee surface, then immediately sprinkle the Heath toffee bits over the wet chocolate so they adhere as it sets.
Cool Completely
Allow the pan to cool at room temperature for about 30 minutes until no longer warm, then transfer to the refrigerator for 1-2 hours until the toffee and chocolate set completely firm before cutting into squares or bars with a sharp knife.
Recipe Notes & Tips
Parchment Paper Essential – Always line your pan with parchment paper rather than aluminum foil, as toffee sticks tenaciously to foil and will tear when you try to remove it.
Graham Cracker Arrangement – Don’t worry about breaking crackers or having perfect alignment; the toffee layer will bind everything together and the final cutting will create uniform pieces regardless of the base layer arrangement.
Butter and Sugar Order – Melt the butter and sugar together from the start rather than melting butter first then adding sugar, as this prevents separation and creates better emulsion.
Visual Cues for Doneness – The toffee mixture is ready when it has thickened enough to coat the back of your spoon and has lightened from dark mahogany to a golden amber color.
Chocolate Melting Timing – Wait the full 5 minutes after adding chocolate chips before spreading so they soften completely; spreading too early creates an uneven layer with lumps.
Clean Cutting Technique – Use a sharp knife dipped in hot water and wiped dry between cuts to create clean edges without cracking the chocolate or toffee layers.
Nutritional Information
Prep Time: 20 minutes
Chilling Time: 1 hour (plus 30 minutes room temperature cooling)
Total Time: 1 hour 20 minutes (plus optional setting time)
Servings: 15 bars (adjust cutting size for more or fewer pieces)
Calories: Approximately 403 calories per bar (based on 15 servings from full recipe)
Perfect Pairings
Coffee Service – Serve alongside espresso, cappuccino, or regular coffee where the bittersweet chocolate and buttery toffee complement coffee’s roasted flavors perfectly.
Ice Cream Topping – Break into small pieces and sprinkle over vanilla ice cream for a crunchy, sweet topping that adds textural contrast to creamy desserts.
Dessert Platters – Arrange on serving trays with cookies, fudge, and other confections where the elegant appearance and sophisticated flavor elevate the overall presentation.
Gift Boxes – Layer in decorative boxes lined with parchment paper as homemade presents that rival store-bought gourmet candies in appearance and taste.
Ideal Occasions
Holiday Celebrations – These elegant bars fit beautifully on seasonal dessert tables, cookie exchanges, or gift baskets where their refined appearance matches festive occasions.
Hostess Gifts – Bring to dinner parties or gatherings as a thoughtful homemade contribution that shows effort and creativity beyond store-bought items.
Bake Sales – Package individually or in small groups for school or community fundraisers where their professional appearance and delicious taste command premium prices.
Special Occasions – Serve at birthdays, anniversaries, or celebrations where you want impressive desserts without the complexity of elaborate cakes or pastries.
Storage & Serving Tips
Room Temperature Storage – Store in an airtight container or resealable plastic bag at room temperature for 5-7 days, separating layers with parchment paper to prevent sticking.
Refrigerated Storage – Extend freshness to 1-2 weeks by refrigerating in an airtight container, though bring to room temperature before serving for optimal texture and flavor.
Humidity Protection – Keep stored candy away from humid environments, as moisture softens the toffee and makes it lose its characteristic crispy snap.
Cutting Strategies – Cut into small squares for elegant presentations or larger bars for more casual servings, adjusting portion sizes based on the richness of the candy.
Creative Variations to Try
Milk Chocolate Version – Substitute milk chocolate chips for dark chocolate to create a sweeter, milder flavor profile that appeals to those who find dark chocolate too intense.
Nut Addition – Sprinkle chopped pecans, almonds, or walnuts over the chocolate layer along with the Heath bits for added crunch and nutty flavor.
Sea Salt Finish – Add a light sprinkle of flaky sea salt over the wet chocolate before it sets to create sweet-salty contrast that enhances the toffee’s richness.
White Chocolate Drizzle – After the dark chocolate sets, melt white chocolate and drizzle it in thin streams across the surface for visual interest and flavor complexity.
Troubleshooting Common Issues
Toffee separating or becoming grainy – This indicates too much heat or stirring after the initial combination; reduce heat once simmering begins and stir gently rather than vigorously.
Chocolate not spreading smoothly – The chocolate chips haven’t softened enough; let them sit longer on the hot toffee, or place the pan briefly in a warm oven to help them melt.
Bars difficult to remove from pan – The parchment paper may not extend far enough up the sides; next time, leave more overhang so you can lift the entire sheet out before cutting.
Toffee too hard or too soft – Cooking time variation affects final texture; slightly longer cooking creates harder, more brittle toffee, while shorter cooking yields softer, chewier results.
Why This Recipe Works
Graham Cracker Toffee succeeds because it simplifies traditional English toffee by using graham crackers as a structural base rather than cooking the toffee to the hard-crack stage freestanding. The graham crackers absorb some of the butter from the toffee layer while maintaining enough structure to support cutting and serving, creating a hybrid texture that’s neither pure candy nor pure cookie. Brown sugar’s molasses content contributes complex flavor while also affecting the toffee’s texture—more molasses means softer, chewier results compared to the brittle snap of white-sugar-based toffees. The combination of butter and brown sugar creates an emulsion during cooking where the fat surrounds sugar crystals, preventing them from growing too large and creating graininess. Baking the toffee-covered crackers serves two purposes: it sets the toffee completely while also allowing any remaining moisture in the graham crackers to evaporate, ensuring maximum crispness. The dark chocolate topping provides more than just flavor—its cocoa butter content helps seal the toffee layer, preventing moisture absorption from the air that would soften it over time. Heath toffee bits add textural interest while reinforcing the toffee flavor throughout. At 403 calories per serving, these bars are rich indulgences best enjoyed in moderate portions, though the intense flavor means a little goes a long way in satisfying sweet cravings.
Final Thoughts
Graham Cracker Toffee Bars demonstrate that impressive homemade candies don’t require professional training or specialized equipment when you understand how ingredients work together. The recipe’s success comes from its clever shortcut of using graham crackers to eliminate the most challenging aspect of toffee-making—cooking sugar to precise temperatures without crystallization. This accessibility means anyone comfortable with basic stovetop cooking can produce results that look and taste like they came from an artisan candy shop. The combination of textures—crispy graham base, chewy-crunchy toffee, smooth chocolate, and crystalline Heath bits—creates sensory complexity that makes these bars endlessly interesting to eat. While certainly an indulgent treat, the portion control inherent in cutting into bars helps manage serving sizes, and the rich flavor means most people find one or two pieces satisfying rather than wanting to continue eating indefinitely. The elegant appearance makes these bars particularly valuable for gift-giving or special occasions where you want to impress without spending hours on elaborate preparations, proving that simplicity and sophistication can coexist deliciously.