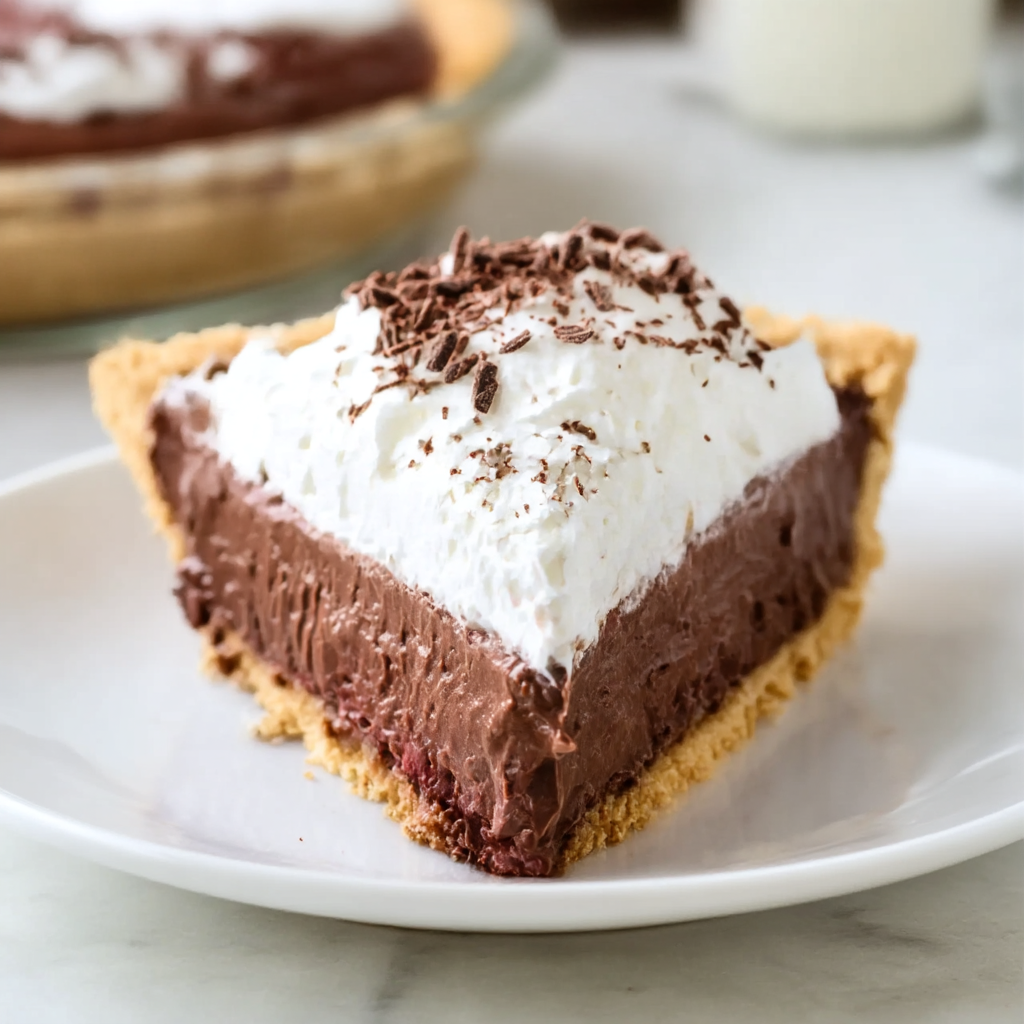
No-Bake Chocolate Pudding Pie delivers rich chocolate flavor and creamy texture using just four ingredients and a pre-made crust. This effortless dessert requires no baking, no complicated techniques, and minimal time—just mix, layer, chill, and serve for impressive results that taste like you spent hours in the kitchen.
Why You’ll Love This Recipe
Incredibly Simple – With only four ingredients and no baking required, this pie comes together in just 10 minutes of active preparation time.
No-Bake Convenience – Perfect for hot summer days when you don’t want to heat up the kitchen, or anytime you need dessert without using the oven.
Foolproof Results – The straightforward assembly and instant pudding base virtually guarantee success, even for novice cooks or children learning to make desserts.
Impressive Presentation – The layered appearance and chocolate shavings on top create an elegant look that belies the simple preparation.
Make-Ahead Friendly – Prepare this pie hours or even a day ahead of serving, making entertaining stress-free and allowing flavors to meld.
Crowd-Pleasing Flavor – Rich chocolate pudding with creamy whipped topping appeals universally across ages and tastes, ensuring everyone enjoys dessert.
Ingredients You’ll Need
Chocolate Base:
1 box (5.85 ounces) instant chocolate pudding – provides the rich chocolate flavor and creamy texture that forms the pie’s foundation
Milk as called for on box (typically 2 cups of 2% milk) – activates the pudding and creates proper consistency
Crust:
1 pre-made 9-inch graham cracker pie crust – delivers sweet, slightly crunchy base that complements the creamy filling without requiring baking
Creamy Layers:
1 tub (8 ounces) whipped cream – adds light, fluffy texture and creates the signature layered appearance
Garnish:
1 regular-sized Hershey’s chocolate bar (1.55 ounces) – provides chocolate shavings for elegant decoration that adds visual appeal and extra chocolate flavor
Step-by-Step Instructions
Prepare Pudding
Make the instant chocolate pudding according to package directions, whisking the pudding mix with the amount of cold milk specified on your specific brand’s instructions until smooth and starting to thicken, about 2 minutes.
Create First Layer
Pour slightly less than half of the prepared chocolate pudding into the bottom of the graham cracker pie crust, spreading it evenly to create a smooth base layer.
Mix Pudding-Cream Layer
In the bowl with remaining pudding, fold in half of the whipped cream (about 4 ounces), stirring gently but thoroughly until completely combined and the mixture is light and fluffy.
Add Second Layer
Spread the pudding-whipped cream mixture over the first pudding layer in the pie crust, smoothing the top with a spatula to create an even surface.
Top with Whipped Cream
Spread the remaining whipped cream (the other half of the tub) over the pudding-cream layer, creating smooth, attractive swirls or peaks with the back of a spoon.
Garnish with Chocolate
Using a vegetable peeler or potato peeler, shave the Hershey’s chocolate bar over the top of the pie, creating delicate chocolate curls that fall naturally onto the whipped cream surface for elegant decoration.
Chill and Serve
Cover the pie carefully with plastic wrap (tent it slightly to avoid disturbing the top) and refrigerate for at least 1 hour to allow layers to set properly before slicing and serving cold.
Recipe Notes & Tips
Instant Pudding Essential – Use instant pudding specifically, not cook-and-serve varieties, as instant sets without heating and creates proper texture for this no-bake pie.
Milk Amount Varies – Different pudding brands require different milk amounts; always check your specific package directions for accurate proportions.
Gentle Folding – When mixing pudding with whipped cream, fold gently to maintain the airy texture rather than stirring vigorously, which deflates the cream.
Layer Proportions – Using “slightly less than half” for the first layer ensures enough pudding remains for the creamy second layer without exact measuring.
Chocolate Shaving Technique – Hold the chocolate bar with a paper towel to prevent melting from hand heat while peeling off delicate curls.
Chilling Time Minimum – While 1 hour is minimum, longer chilling (2-4 hours or overnight) allows flavors to meld and layers to set more firmly for cleaner slicing.
Nutritional Information
Prep Time: 10 minutes
Chill Time: 1 hour (minimum)
Total Time: 1 hour 10 minutes
Servings: 8 slices
Calories: Approximately 216 calories per slice

Perfect Pairings
Fresh Coffee – Serve with hot coffee where bitter notes balance the sweet chocolate and enhance the dessert experience.
Cold Milk – Offer tall glasses of cold milk that complement the chocolate flavor and provide refreshing contrast to the creamy richness.
Fresh Berries – Garnish plates with fresh raspberries or strawberries whose tartness cuts through the sweetness and adds color.
Vanilla Ice Cream – Add a small scoop of vanilla ice cream alongside each slice for temperature contrast and additional indulgence.
Ideal Occasions
Summer Gatherings – This no-bake pie shines during warm weather when you want impressive dessert without heating the kitchen.
Potluck Contributions – Transport easily in its own pie plate and serve chilled, making it ideal for bring-a-dish events.
Last-Minute Guests – Prepare quickly when unexpected company arrives, as the short prep and chill time fit into tight schedules.
Kids’ Cooking Projects – Involve children in making this simple dessert where they can successfully complete every step with minimal supervision.
Storage & Serving Tips
Refrigerator Storage – Cover tightly with plastic wrap or aluminum foil and store in the refrigerator in the original pie dish for up to 3 days.
Make-Ahead Strategy – Prepare the pie through the pudding-cream layer up to 24 hours ahead, adding final whipped cream and chocolate shavings just before serving.
Freezing Not Recommended – The pudding and whipped cream lose their creamy texture when frozen and thawed, becoming watery and separated.
Serving Temperature – Serve directly from the refrigerator while cold, as the pie softens quickly at room temperature and becomes difficult to slice neatly.
Creative Variations to Try
Oreo Crust Version – Use an Oreo cookie crust instead of graham cracker for more intense chocolate flavor throughout.
Peanut Butter Layer – Mix ¼ cup peanut butter into the pudding-cream layer for chocolate-peanut butter combination.
Mint Chocolate Pie – Add ½ teaspoon peppermint extract to the pudding for refreshing mint-chocolate flavor.
Banana Layer – Slice bananas over the first pudding layer before adding the pudding-cream mixture for banana cream chocolate pie.
Troubleshooting Common Issues
Pudding not setting – Ensure you used instant pudding and whisked thoroughly for 2 minutes; if still thin, refrigerate 15 minutes before layering.
Layers mixing together – Let the first pudding layer set slightly (10-15 minutes in fridge) before adding the second layer to maintain distinction.
Whipped cream deflating – Fold gently rather than stirring vigorously, and use full-fat whipped cream rather than light versions that don’t hold structure as well.
Chocolate shavings melting – Hold the chocolate bar with a paper towel to keep it cool, and shave directly over the cold pie for best results.
Why This Recipe Works
No-Bake Chocolate Pudding Pie succeeds through its strategic layering that creates visual interest and textural variety from minimal ingredients. Instant pudding sets without heating through modified food starch that thickens when mixed with cold milk, creating stable structure that supports additional layers. Dividing the pudding creates depth—the straight pudding layer provides intense chocolate flavor, while mixing the second portion with whipped cream lightens the texture and creates contrast. The graham cracker crust provides sweet, slightly crunchy base that remains crisp because the pudding layers don’t add excessive moisture. Whipped cream topping adds lightness that balances the denser pudding layers below while creating attractive presentation. The chocolate shavings provide visual elegance and textural interest against the smooth cream. Chilling sets all layers and allows flavors to meld while firming the structure for clean slicing. At 216 calories per slice, this pie provides reasonable dessert portions that satisfy chocolate cravings without excessive indulgence.
Final Thoughts
No-Bake Chocolate Pudding Pie proves that impressive desserts don’t require complicated techniques, expensive ingredients, or hours of preparation. The convenience of instant pudding and pre-made crust makes this pie accessible even during busy periods when you need something sweet but lack time for extensive baking. The layered appearance creates visual appeal that makes this pie suitable for entertaining despite the minimal effort required. While certainly a dessert rather than health food, the reasonable calorie count and built-in portion control from slicing make this treat more moderate than many alternatives. This pie demonstrates that sometimes the simplest recipes become family favorites precisely because they’re easy enough to make frequently, reliable enough to always succeed, and delicious enough to satisfy completely. Whether you’re a novice baker building confidence or an experienced cook seeking convenience, this chocolate pudding pie delivers exactly what you need—easy, delicious dessert that brings happiness to every gathering.