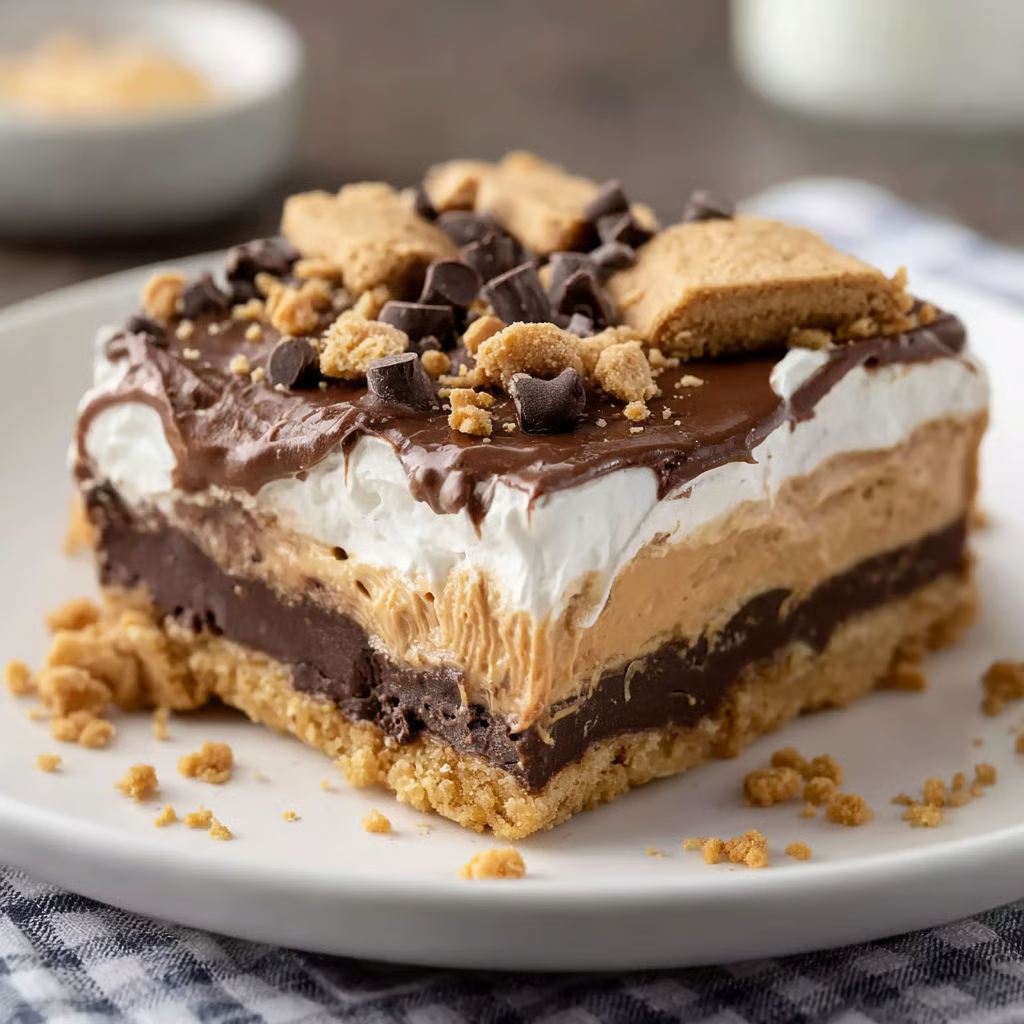
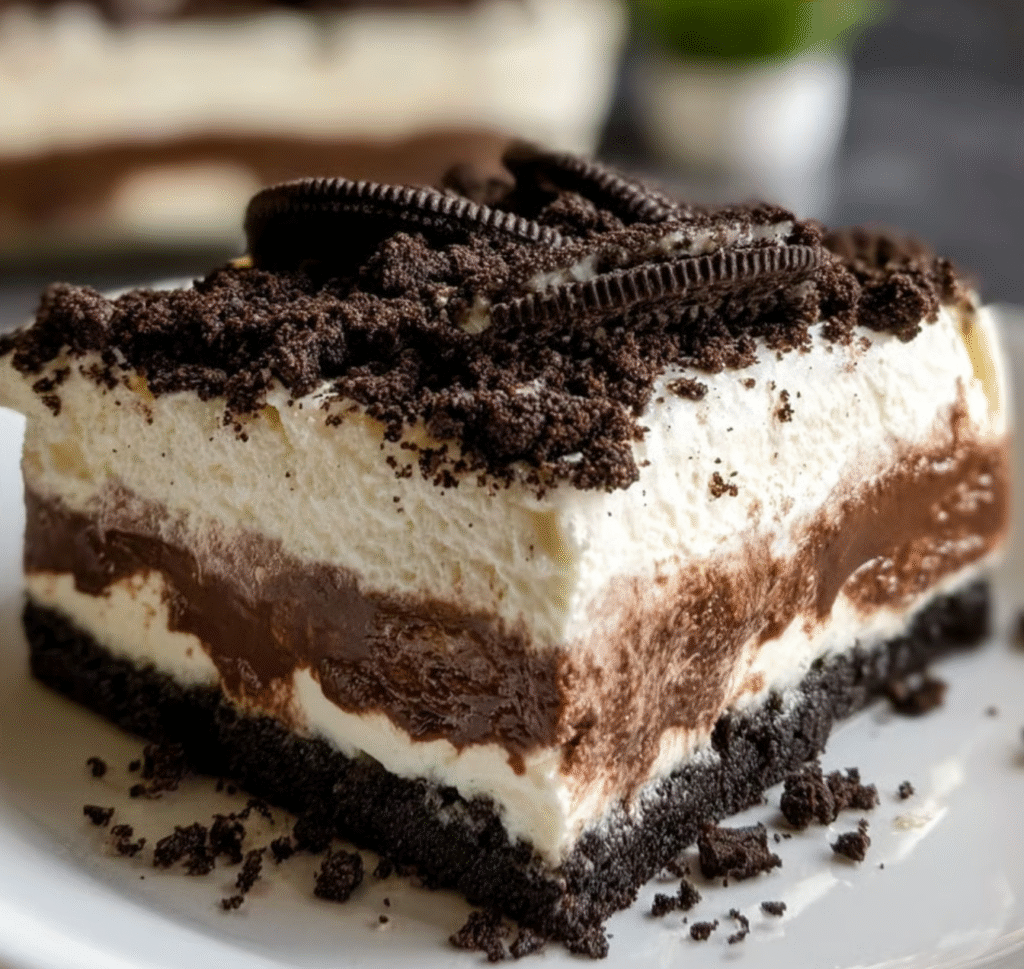
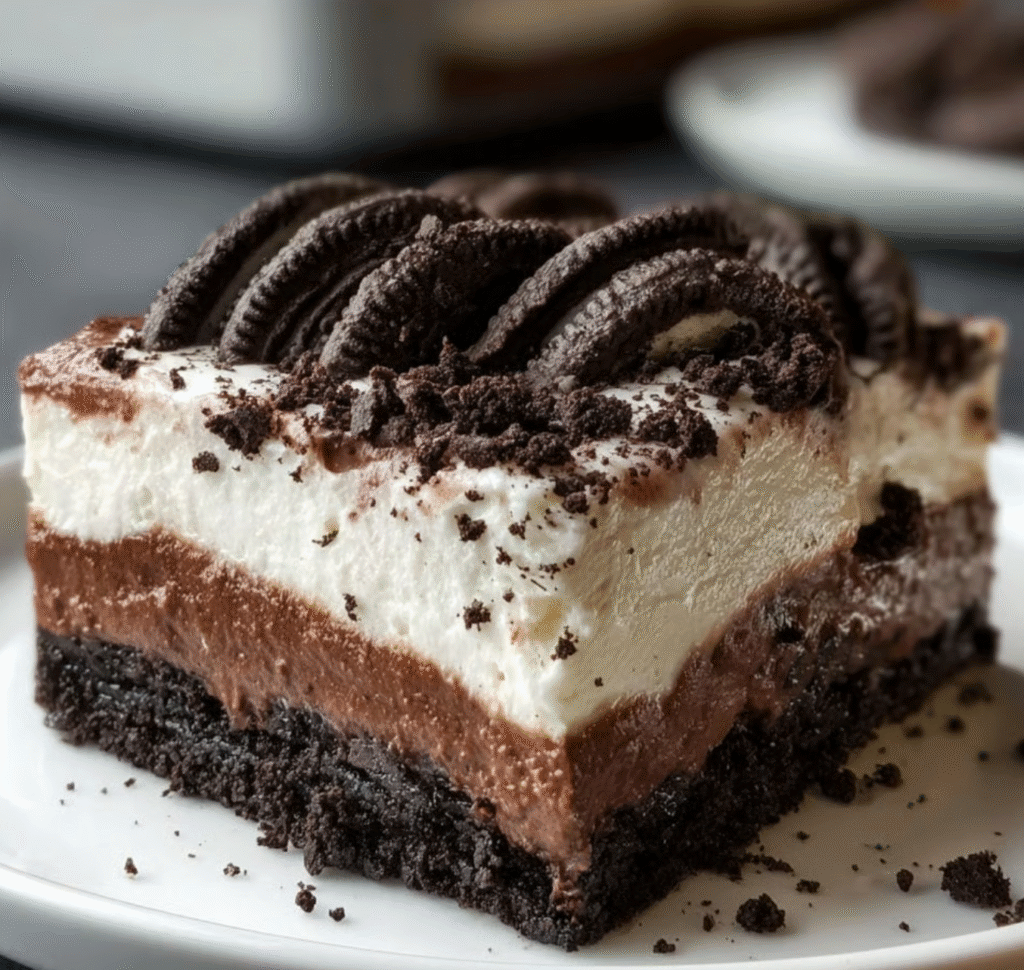
This decadent, no-bake dessert features four distinct layers of texture and flavor, starting with a buttery cookie crust and alternating between a tangy cheesecake filling and smooth chocolate pudding. Known as a “lasagna” for its stratified presentation, this treat combines the crunch of Oreos with the airy lightness of whipped topping. It is an impressive centerpiece that requires zero oven time, making it perfect for convenient entertaining.
Why You’ll Love This Recipe
- No Oven Required – This is a completely no-bake recipe, keeping your kitchen cool and freeing up oven space for other dishes.
- Crowd-Pleasing Quantities – Yielding 16 generous servings, this 9×13 dish is specifically designed to feed larger groups at gatherings.
- Texture Symphony – The recipe balances the granular crunch of the crust and cookie bits against the silky pudding and fluffy cream cheese layers.
- Make-Ahead Friendly – Because the dessert requires several hours to set, it is the ideal candidate for preparing a day in advance to reduce stress.
- Beginner Proof – While it looks intricate, the assembly relies on simple mixing and spreading techniques accessible to any skill level.
- Clean Slicing – When chilled properly, the layers firm up beautifully, allowing you to serve distinct, bakery-style squares.
Ingredients You’ll Need
The Crust
- 48 Oreo cookies, finely crushed – Provides the structural base; using the cream filling in the crush adds stability.
- 10 tablespoons salted butter, melted – Acts as the binder for the crust; the salt helps cut through the intense sweetness of the cookies.
Cream Cheese Layer
- 12 ounces cream cheese, at room temperature – The foundation of the “cheesecake” layer; must be soft to ensure a lump-free texture.
- 3/4 cup powdered sugar – Sweetens the cream cheese and dissolves instantly without leaving a gritty texture.
- 8 ounces Cool Whip, thawed – Folded in to aerate the mixture, making it light and spreadable.
- 1 teaspoon vanilla extract – Enhances the flavor profile.
- 6 Oreo cookies, finely crushed – Added for texture within the creamy layer.
Pudding Layer
- 3 cups half and half or whole milk – Cold liquid is essential for the instant pudding to activate and thicken properly.
- 7.8 ounces instant chocolate pudding mix – Provides the rich chocolate flavor and sets quickly (ensure it is not “cook and serve”).
- 6 Oreo cookies, finely crushed – Reinforces the cookie theme within the chocolate layer.
Topping
- 8 ounces Cool Whip, thawed – Creates the final cloud-like layer.
- 12 Oreo cookies, finely crushed – A generous garnish that signals the flavor profile to the eater.
Step-by-Step Instructions
1. Prepare the Crust In a large mixing bowl, combine the 48 finely crushed Oreo cookies with the melted salted butter. Stir firmly until the mixture resembles damp, dark sand. Dump the mixture into a 9×13 inch baking dish and use the bottom of a measuring cup or glass to press it down into a firm, compact, and even layer. Place the dish in the refrigerator to chill while you prepare the filling.
2. Mix the Cream Cheese Layer Using a hand mixer or stand mixer fitted with the paddle attachment, beat the room-temperature cream cheese and powdered sugar together until completely smooth and free of lumps. Add the vanilla extract and the first batch of Cool Whip (8 oz), mixing until fully incorporated. Gently fold in the 6 crushed Oreos by hand to preserve their crunch. Spread this mixture evenly over the chilled crust using an offset spatula, then return the pan to the refrigerator.
3. Whisk the Pudding Layer In a clean mixing bowl, whisk together the cold half and half (or whole milk) and the instant chocolate pudding mix. Whisk vigorously for about 2 minutes until the mixture begins to thicken significantly. Fold in the next 6 crushed Oreos. Pour and spread this pudding mixture over the cream cheese layer, handling it gently so the layers don’t mix. Refrigerate for 5 minutes to let the pudding set slightly.
4. Add Topping and Set Spread the remaining 8 ounces of Cool Whip gently over the pudding layer to create a smooth white surface. Sprinkle the top generously with the remaining 12 crushed Oreos. Cover the dish and refrigerate for at least 4 hours (overnight is preferred) to allow all layers to firm up into a sliceable consistency.
Recipe Notes & Tips
- Room Temperature Ingredients – It is critical that the cream cheese is fully softened. If it is cold, it will not blend with the sugar and will result in small white lumps in your filling.
- Crushing Techniques – For the crust, pulse the cookies in a food processor to get fine crumbs for better binding. For the mix-ins and topping, you can crush them in a zip-top bag with a rolling pin for coarser chunks.
- Pudding Selection – You must use Instant pudding mix. “Cook and Serve” pudding will not thicken with cold milk and will result in a soupy lasagna.
- Spreading Layers – Use an offset spatula or the back of a large spoon. Drop dollops of the filling across the surface and connect them gently rather than dumping it all in the center and pushing it out, which can drag the layer underneath.
- Chill Time – Do not rush the 4-hour chilling window. This time allows the moisture to redistribute and the fats to resolidify, ensuring the dessert holds its shape when cut.
Nutritional Information
- Prep Time: 30 minutes
- Chilling Time: 4+ hours
- Total Time: 4 hours 30 minutes
- Servings: 16 Servings
- Calories: Approximately 380-450 kcal per serving (Estimation based on ingredients)
Perfect Pairings
- Hot Coffee – The bitterness of a dark roast coffee balances the extreme sweetness of the dessert.
- Fresh Raspberries – Serving with a side of tart berries cuts through the richness of the chocolate and cream.
- Cold Milk – A classic accompaniment that complements the Oreo flavor profile perfectly.
- Mint Garnish – A sprig of fresh mint adds a pop of color and an aromatic freshness to the heavy dish.
Ideal Occasions
- Summer Potlucks – Since it requires no oven, it’s a favorite for hot weather gatherings where you need to feed a lot of people.
- Birthday Parties – A fun, sliceable alternative to traditional cake that is particularly popular with children.
- Holiday Dessert Tables – The visually distinct layers make for a beautiful presentation on a buffet line.
- Office Parties – It transports easily in the 9×13 pan and can be cut into smaller bite-sized squares for grazing.
Storage & Serving Tips
- Refrigeration – Keep the dessert refrigerated at all times when not serving. It will soften and lose structure if left out in a warm room for too long.
- Shelf Life – This dessert is best consumed within 3-4 days. After that, the crust may begin to absorb too much moisture and become soggy.
- Freezing – For longer storage, this dessert freezes exceptionally well. Wrap tightly and freeze for up to 1 month. Thaw in the refrigerator overnight before serving.
- Slicing – For the cleanest cuts, wipe your knife with a warm, damp paper towel between each slice.
Creative Variations to Try
- Mint Chocolate – Add 1/2 teaspoon of peppermint extract to the cream cheese layer and use green food coloring for a “Grasshopper” style dessert.
- Peanut Butter – Mix 1/2 cup of creamy peanut butter into the cream cheese layer for a chocolate-peanut butter combination.
- Golden Oreo – Substitute standard Oreos with Golden Oreos and use vanilla pudding instead of chocolate for a non-chocolate version.
- Double Chocolate – Use chocolate milk instead of regular milk in the pudding layer for an intense chocolate experience.
Troubleshooting Common Issues
- Crust is Crumbly – This usually means there wasn’t enough butter to saturate the crumbs, or the crumbs were too coarse. Ensure crumbs are fine and fully moistened.
- Pudding is Runny – This often happens if using plant-based milks (like almond or soy) which don’t react the same way with instant pudding thickeners. Stick to dairy cow’s milk for best results.
- Messy Layers – If the layers are blending together, the bottom layer wasn’t chilled enough before adding the next one. Patience is key.
- Soggy Crust – This can occur if the dessert sits for more than 4-5 days. Consume while fresh for the best texture contrast.
Why This Recipe Works
The Oreo Lasagna works on the principle of temperature-based setting rather than heat-based cooking. The crust relies on the saturation of cocoa-rich cookie crumbs with butter, which solidifies when chilled to create a firm base. The “cheesecake” layer utilizes the stabilizers in Cool Whip and the fat in cream cheese to create a structure that is airy yet firm enough to support the weight above it. Finally, the instant pudding relies on modified food starches that gelatinize rapidly when introduced to cold milk. By layering these different viscosities and allowing them to set in a cold environment, you create a cohesive unit that offers a complex mouthfeel—crunchy, creamy, and silky—in every bite. Nutritional Note: This is a high-calorie, high-sugar dessert. Enjoy in moderation.
Final Thoughts
This Oreo Lasagna is the ultimate convenience dessert that delivers maximum flavor impact for minimal effort. It captures the nostalgic flavor of cookies and cream in a sophisticated, layered format that appeals to both children and adults. Whether you are avoiding the heat of the oven or simply need a reliable make-ahead dish for a party, this recipe is a guaranteed success.